Acronis Backup Agent is an essential tool for businesses and organizations that rely heavily on their data. It provides a simple and reliable way to protect your server data from any potential loss. Installing the Acronis Backup Agent on Windows Server 2022 is an easy process that can be done in just a few simple steps.
In this article, we will walk you through how to install the Acronis Backup Agent on your Windows Server 2022 machine, step-by-step.
Pre-requisities
- RDP Access to Windows Server 2022 with an Administrator-level account
- Active Acronis Backup Account (purchase Acronis backup protection from €7.5/month)
Step 1: Download the Installation File
As soon as your Acronis cloud backup account is activated, you will receive an email notification and your login credentials can be retrieved from within your myNetShop portal account.
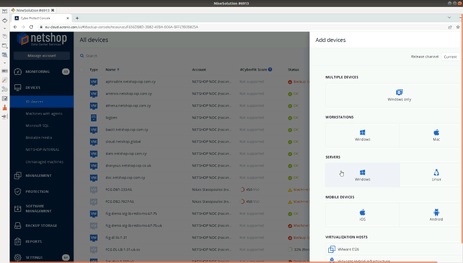
The first step is to visit the Acronis portal (https://eu-cloud.acronis.com), click “Devices” from the left side menu and then click the “+ Add” button on the top right of your screen. Choose “Windows Server” so that the download starts of the installation file for the Backup Agent for Windows Server.
Once you have downloaded the installation file, save it to your computer’s hard drive in a location that you can easily access.
Step 2: Run the Installation File
Locate the downloaded installation file and double-click on it to start the setup wizard. You may receive a pop-up asking if you want to allow the app to make changes to your device. Click “Yes” to proceed with the installation.
Step 3: Read and Accept the License Agreement
Read through the license agreement and click “I Accept” if you agree with the terms and conditions of the agreement.
Step 4: Choose Your Installation Settings
In this step, you will need to choose your desired installation settings. You can select the installation path, whether or not to create a desktop shortcut, and other advanced options.
By default, Acronis will install to the C:\Program files\ path on your computer. If you’d like to change the installation path, simply click the “Change” button and select a new location on your computer.
Step 5: Start the Installation
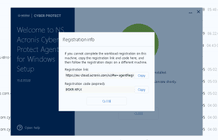
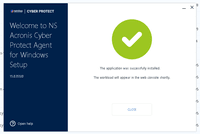
After you’ve configured your installation settings, click “Install” to begin the installation process. This may take a few minutes to complete. As soon as installation completed you will need to register the device as per the instructions you will see on the installation wizard.
Step 6: Configure the Backup Agent
Once the installation is complete, launch the Acronis Backup Agent on your Windows Server 2022 machine and configure it according to your needs.
In the main dashboard, you can select backup schedules, choose backup destinations, and configure other advanced settings as needed. Be sure to test your backup settings to ensure that they are working properly.
Congratulations! You have successfully installed Acronis Backup Agent on your Windows Server 2022 machine.
Conclusion
As you can see, installing Acronis Backup Agent on Windows Server 2022 is a quick and simple process. By following these easy steps, you can set up regular system backups to protect your critical data and safeguard against any data loss.
Don’t forget to regularly test your backup settings to ensure they are working properly. With Acronis Backup Agent, you can rest easy knowing that your data is secure and protected in the event of any unexpected data loss or system failure.


