The remote accessibility of a Windows server is managed by the Remote Desktop Services (given it’s enabled) which “listens” to port 3389 and its open by default. Whilst this is an essential communication protocol for establishing connection to remote Windows machines, it is often used by hackers to deliver a ransomware or a DDoS attack to a single server or a distributed network of inter-connected machines.
One of the best security practices we follow when setting up Windows Servers is to change the default RDP port ‘3389’ to a custom, non-standard port. Have in mind that ports ranging from 1 to 1023 are called known or standard ports, while ports 49152-65535 are dynamic/non-standard. You are free to use any ports from the dynamic range but not one from the known/standard range as the latter may be in use by another Windows service.
In this article we will explain how to change the RDP Port on Windows Server 2016/2019/2022 via regedit and then make the necessary changes on Windows Firewall for allowing inbound connections to the new RDP port.
How To Change RDP Port on a Windows Server
Pre-requisites
- Tutorial steps can be applied (tested) on Windows Server 2012 R2, Windows Server 2016, Windows Server 2019 and Windows Server 2022
- Access on Windows Server using Administrator or any other user with admin privileges
- Out-of-band access on the server such as iDRAC or iLO – useful in case you lose remote connection to the server over the public network
Steps to Change RDP Port from Registry (regedit)
- Type regedit in the Search box
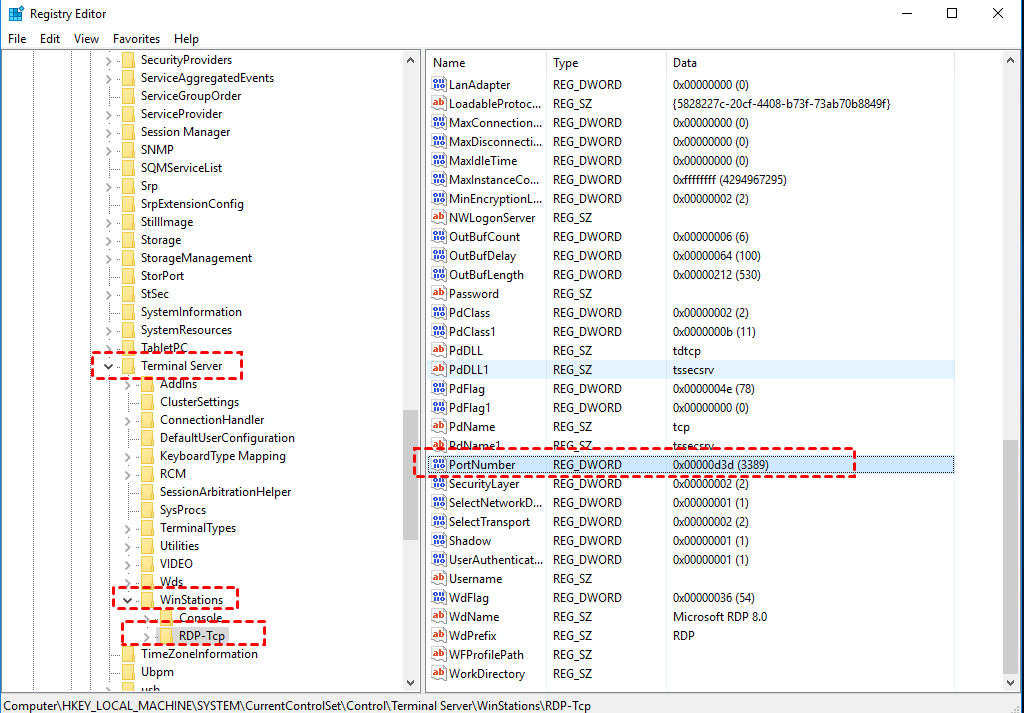
- From the left navigation bar follow this path: HKEY_LOCAL_MACHINE\System\CurrentControlSet\Control\Terminal Server\WinStations\RDP-Tcp
- Find PortNumber
- Right-click Edit, then click Modify, and then click Decimal
- Type your new desired port number, and then click OK.
- Close the registry editor and restart your server*
* Proceed with server restart only if you are sure there is no Firewall on your server. In any other case, read further below how to whitelist the new RDP port on Windows Firewall.

Allow Custom RDP Port on Windows Firewall
Depending on your Windows Firewall state, you may need to add the new RDP port in the Inbound rules to ensure new connections will be allowed.
- Open Windows Firewall on your Server (type firewall in the Search box)
- From the left-hand navigation, click Inbound Rules
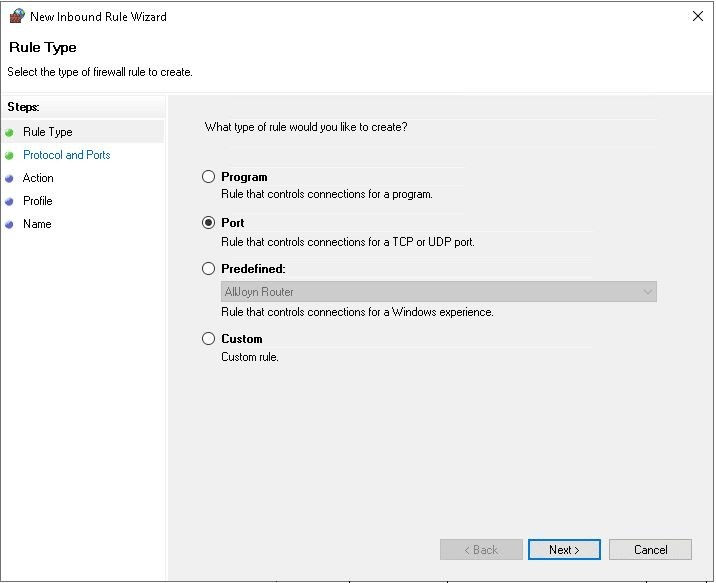
- Click New Rule in the right-hand pane to open the New Inbound Rule Wizard.
- In the New Inbound Rule Wizard, under the Rule Type section, select Port and click Next
- In the Protocol and Ports section, select TCP. Next, select Specific local ports, enter the custom RDP port as you have set it in Registry and then click Next
- In the Action section, select Allow the connection and click Next
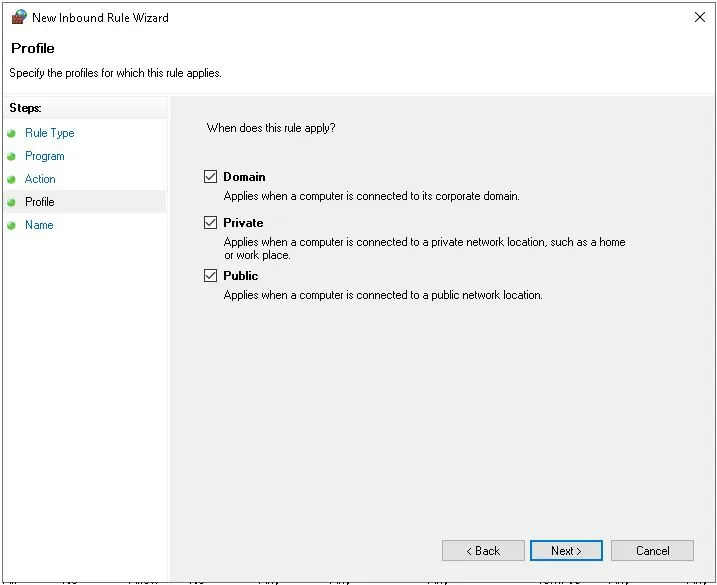
- In the Profile section, select all appropriate profiles for when this rule applies and click Next
- Finally, give your new rule a descriptive name so that it is easy to find later, and click Finish.
- Reboot your server if you haven’t done so after the registry changes


Verify New RDP Port with PowerShell
Once your server has been rebooted you should be able to access it with the newly added RDP Port. To verify the newly set RDP port number, open PowerShell and run the following command:
Get-ItemProperty -Path 'HKLM:\SYSTEM\CurrentControlSet\Control\Terminal Server\WinStations\RDP-Tcp' -name "PortNumber"Sample Output:
PortNumber : 61489
PSPath : Microsoft.PowerShell.Core\Registry::HKEY_LOCAL_MACHINE\SYSTEM\CurrentControlSet\Control\Terminal Server\WinStations\RDP-Tcp
PSParentPath : Microsoft.PowerShell.Core\Registry::HKEY_LOCAL_MACHINE\SYSTEM\CurrentControlSet\Control\Terminal Server\WinStations
PSChildName : RDP-Tcp
PSDrive : HKLM
PSProvider : Microsoft.PowerShell.Core\Registry
This is it! You have successfully changed your Windows Server’s Remote Desktop Port and allowed it through your Windows Firewall.


