Ubuntu 18.04 is one of the most popular Operating systems when purchasing a VPS or a Dedicated server. If you have purchased a VPS or Dedicated Server from NetShop ISP, or any other hosting company, then most likely the distribution installed is the Ubuntu Server 18.04 which means you will need to manage your server via terminal (CLI).
In this article we will show you the easiest way to install GNOME Desktop on your Ubuntu server, so you can manage it via GUI (Graphical User Interface) as if you are working on your personal computer.
Step 1. Check Pre-requisites
All you need is access on your Ubuntu server and have a user account with sudo privileges, or the root account itself.
Step 2. Update Ubuntu 18.04
Before we proceed with the GNOME Desktop installation, you need to update and upgrade your OS packages, including the kernel. Do it by typing the following commands:
sudo apt-get update -ysudo apt-get upgrade -yThe “-y” parameter in the end means you will not be prompted to choose Y/n during the updates and upgrades process. It will consider “Yes” automatically and proceed further.
Once the execution of tasks is completed, reboot your server:
shutdown -r nowStep 3. Install GNOME
It’s time to proceed with the GNOME installation. As this will require a lot of packages with dependencies to be installed, we will use a special tool named tasksel. Tasksel is a tool available in Ubuntu and Debian distributions which helps to install multiple related packages with their dependencies, as a coordinated task.
To install Tasksel, login to your server after it has been rebooted and type this command:
sudo apt-get install tasksel -yOnce the installation completes, continue with the following command:
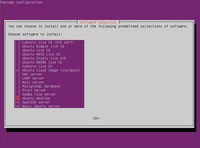
sudo taskselUpon issuing the above command, you will see the following screen. Scroll down in the list and select the “Ubuntu Desktop” option as indicated below.
By clicking “OK”, Tasksel will begin installing all necessary packages for the GNOME Desktop on your Ubuntu server.
Grab a coffee and allow it a couple of minutes until the installation completes. Then reboot your server again.
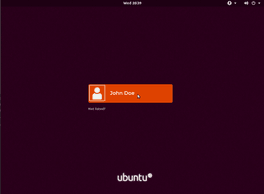
Once it’s up again, you will see the login screen by Ubuntu’s new LightDM Display Manager, as shown below.
Congratulations! You have now GNOME Desktop GUI installed on an Ubuntu server 18.04!
Still Need Help?
If you are a NetShop ISP customer, then we can help further! Simply contact our Technical support team via ticket (https://my.netshop-isp.com.cy) and we can install GNOME Desktop on your Ubuntu server.


