


WordPress has become a leading content management system thanks to its user-friendly interface, versatile customization capabilities, and growing community. Deploying WordPress with LAMP on an AlmaLinux 9 server offers a reliable and powerful web hosting solution.
LAMP stands for Linux Apache MySQL PHP-Pearl-Python. It’s a popular-among-developers tech stack for hosting content management systems (WordPress, Drupal, Joomla, etc) and other web-based applications.
In this guide, we’ll provide you a step-by-step guide to installing WordPress with LAMP on an AlmaLinux 9 server.
Prerequisites
- Server running Almalinux 9.x
- LAMP Stack installed
- SSH Access with root or sudo-privileged user
Step 1: Switch to Root user
First, switch to the root user using the following command. Unless stated otherwise, all subsequent commands must be executed as the root user.
johndoe@localhost:~$ sudo -iStep 2. Install PHP MySQL Extension
WordPress requires that a PHP MySQL Extension is installed so that it can connect to a MySQL database. Ensure the extension is present by running the following command.
root@localhost:~$ yum install php-mysqliStep 3. Create Database & User
Next you need to create a WordPress database and database user. Run the following command to access MySQL shell on your server.
root@localhost:~$ mysql -uroot -p
As soon you enter the mysql’s root password you will get access to the MySQL shell which looks like this:
Welcome to the MySQL monitor. Commands end with ; or \g.
Your MySQL connection id is 640035
Server version: 8.0.43 MySQL Community Server - GPL

Copyright (c) 2000, 2025, Oracle and/or its affiliates.

Oracle is a registered trademark of Oracle Corporation and/or its
affiliates. Other names may be trademarks of their respective
owners.

Type 'help;' or '\h' for help. Type '\c' to clear the current input statement.

mysql>
Below is the list of commands needed to create a database for WordPress, alongside a user that has full access to the database.
mysql> CREATE DATABASE wordpress;
mysql> CREATE USER admin@localhost IDENTIFIED BY 'my-password';
mysql> GRANT ALL ON wordpress.* TO admin@localhost;
mysql> FLUSH PRIVILEGES;
Sample Output:
MariaDB [(none)]> CREATE DATABASE wordpress;

Query OK, 1 row affected (0.005 sec)

MariaDB [(none)]> CREATE USER wpuser@localhost IDENTIFIED BY 'my-password';

Query OK, 0 rows affected (0.011 sec)

MariaDB [(none)]> GRANT ALL ON wordpress.* TO wpuser@localhost;

Query OK, 0 rows affected (0.003 sec)

MariaDB [(none)]> FLUSH PRIVILEGES;

Query OK, 0 rows affected (0.006 sec)

MariaDB [(none)]> exit

Bye
Make sure to note the database name and user/ password as we will need those later. For the purposes of this tutorial, we created a database named wordpress and user wpuser with password my-password.
Step 5. Download & Install WordPress
With the Apache web server running and the MariaDB database in place, we now need to deploy WordPress.
First, download the latest version of WordPress by running the following command.
root@localhost:~$ curl -L -O http://wordpress.org/latest.tar.gzThis will download a file called latest.tar.gz in the current directory. Extract the downloaded file by executing the following command.
root@localhost:~$ tar -zxvf latest.tar.gzNow we need to move the directory we just extracted to the directory Apache is configured to serve files from. Unless specified otherwise, this directory is /var/www/html.
root@localhost:~$ mv wordpress /var/www/htmlWordPress comes with a sample configuration file we can use as a template for inserting our own configuration. Copy the sample configuration file to the location WordPress expects to read the actual configuration file from.
root@localhost:~$ cp /var/www/html/wordpress/wp-config-sample.php /var/www/html/wordpress/wp-config.phpUsing your favourite editor, edit wp-config.php. We like to use the vi editor.
root@localhost:~$ vi /var/www/html/wordpress/wp-config.phpFind the following lines:
define( 'DB_NAME', 'database_name_here' );
define( 'DB_USER', 'username_here' );
define( 'DB_PASSWORD', 'password_here' );
Use the values that you chose when creating the WordPress database and user. As per this tutorial, the values will change as follows:
define( 'DB_NAME', 'wordpress' );
define( 'DB_USER', 'dbusr' );
define( 'DB_PASSWORD', 'my-password' );
Save the file and exit.
Step 6. Update Ownership and File Permissions
The last step of the WordPress installation process is to update the ownership and permissions of the wordpress folder, so Apache can have secure access. Do as follows:
root@localhost:~$ chown -R apache:apache /var/www/html/wordpressroot@localhost:~$ find /var/www/html/wordpress -type d -exec chmod 750 {} \;Then assign the appropriate permissions to all WordPress files.
root@localhost:~$ find /var/www/html/wordpress -type f -exec chmod 640 {} \;Step 7. Complete Installation
If all went well then by typing navigating to http://SERVER_IP/wordpress on your browser, you should be seeing the WordPress installation page. Make sure to replace SERVER_IP with the actual ip address of your Almalinux server.

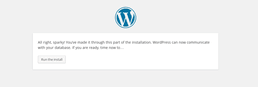
Voila! Follow the on-screen instructions to complete the WordPress installation.
Still Need Help? Get Expert WordPress Assistance from NetShop ISP
We’ve been around for the last 20 years helping freelancers and businesses get an online presence. Our web hosting specialists can help you install and further optimize WordPress on Dedicated Servers or VPS.
Feel free to contact us before purchasing your desired server plan so we can advise you on the specifications of the server according to your bespoke needs.


