UPCOMING EVENT

NetShop ISP Attend iFX EXPO Dubai (14-16 Jan 2025)

Let's Meet!
  • +357 2425 0808
  • Login
  • English

Home

Blog

How To Install Zimbra 9 on Ubuntu 20.04 ...

How To Install Zimbra 9 on Ubuntu 20.04 Server using Automatic Installer

How To Install Zimbra 9 on Ubuntu 20.04 Server using Automatic Installer

NetShop ISP

NetShop ISP · Blog Author

Jun 29, 2022 · Technical Tutorials

Earlier this month, Zimbra introduced an installer script, named zinstaller, which takes care of the entire installation of Zimbra server in just three simple commands.

The installer is compatible, at this point, with Ubuntu 18 and Ubuntu 20 operating systems. In this article we will show you, step-by-step, how to get a Zimbra 9 server deployed using the automatic installer.

Step 1 – Deploy Ubuntu 20.04 Virtual Server

Any Virtual Server (VPS) ordered from NetShop ISP is deployed within 30 seconds. Simply go to the Virtual Servers page and choose your desired VPS plan. Here are the minimum hardware specifications for a Zimbra 9 OSE:

  • 16GB RAM
  • 4 vCPU
  • 10GB of Hard Disk

During the checkout process you will be asked to choose Operating System. Choose Ubuntu 18.04 or Ubuntu 20.04 and you are good to go!

Step 2 – Create Hostname & MX Record

Once your Ubuntu Server is ready login as root and run this command:

hostnamectl set-hostname mail.mycompany.com

Now, login to your Domain Registrar and create the following DNS records:

Hostname: mail.mycompany.com
TTL: 600
DNS Record Type: A
IP Address: your_ubuntu_server_IP_address

and

Hostname: mycompany.com (or “@”)
TTL: 600
DNS Record Type: MX
Priority: 0
MX Record: mail.mycompany.com (or your_ubuntu_server_IP_address)

Step 3 – Run the zInstaller script

Once the DNS propagation completes, your Ubuntu server should be reachable under mail.mycompany.com. You are now ready to install Zimbra 9 server using the zinstaller script.

As root, enter the following commands on your Ubuntu server:

wget https://raw.githubusercontent.com/Zimbra/zinstaller/master/zinstaller -O /root/zinstaller

Then type:

chmod +x /root/zinstaller

Finally, run the installer script using the following command with these parameters:

/root/zinstaller -p put-a-password-here -n mail -t 'Europe/London' mycompany.com

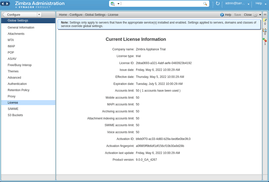
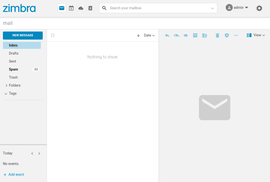
You are done! Your Zimbra 9 server has been successfully installed using a 90-day trial license.

Press Releases
82

Free VPS Trial

No Credit Card Required.

Recent Posts

NetShop ISP to Announce Expansion in New Data Centers during the iFX EXPO Dubai 2025

NetShop ISP to Announce Expansion in New Data Centers during the iFX EXPO Dubai 2025

08 January, 2025

How To Upgrade Server from Debian 10 (Buster) to Debian 12 (Bookworm)

How To Upgrade Server from Debian 10 (Buster) to Debian 12 (Bookworm)

02 January, 2025

2024: A Landmark Year in NetShop ISP’s History

2024: A Landmark Year in NetShop ISP’s History

23 December, 2024

NetShop ISP Leads Conversations on AI Trading at Cyprus Fintech Summit 2024

NetShop ISP Leads Conversations on AI Trading at Cyprus Fintech Summit 2024

16 December, 2024

Black Friday & Cyber Monday Offer – 30% Lifetime Discount on VPS Plans

Black Friday & Cyber Monday Offer – 30% Lifetime Discount on VPS Plans

02 December, 2024

#letushostyou

Award Winning Hosting Provider established in 2004.

120 Faneromenis Avenue, Imperial Tower, 2nd Floor, Larnaca 6031, Cyprus

Products

Bare Metal Servers

Customized Servers

Virtual / Cloud Servers

Forex VPS

Storage VPS

cPanel Web Hosting

Reseller Web Hosting

Colocation

Addons

Premium DNS

Email Hosting

Cloud Backup

DDoS Protection

Licenses

SSL Certificates

Domain Names

Premium SLAs

About Us

Data Center Locations

Looking Glass

Our Company

Contact Us

Careers in Cyprus

Become a Partner

Awards

Certifications

© 2024 S.S. NetShop Internet Services Ltd. All rights reserved.  Terms & Conditions  |  Privacy Policy
CY Reg. Number: HE 217340 | EU VAT Number: CY10217340J

Visa
Mastercard
PayPal
Bitcoin
Tether
Ethereum
Litecoin
Wise
Revolut
Wire Transfer