In a previous article we explained how to connect to your Linux server via SSH on Mac. In today’s article we will provide the easiest way to connect to a Windows Server via RDP on Mac.
Let’s start with the three (3) easy steps you need to do on your Mac to connect via RDP on a Windows server.
Step 1 – Download the Microsoft Remote Desktop application from App Store
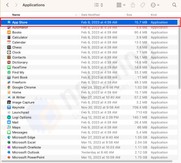
Open the Mac App Store either by clicking the blue icon on your Mac’s dock, or by clicking the App Store within the Mac’s Applications folder as shown below.
Once the App Store has loaded on your screen, search for Microsoft Remote Desktop using the top left search bar.
To begin downloading the Remote Desktop application, click the blue GET button. Alternatively, if you have previously downloaded the same application, then you will now see a blue cloud icon which you should click for the download to start. See the screenshot below for reference.
Step 2 – Run the Microsoft Remote Desktop App
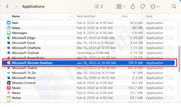
Once the app download finishes, you will find its icon within the Applications folder as shown in the screenshot below. Click it and the Microsoft Remote Desktop app will open.
As soon as the application opens you will see a screen as per the screenshot below. Click the blue Add PC button.
Step 3 – Enter Credentials and Adjust settings for connecting to the remote Windows Server
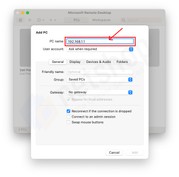
Once you click the Add PC button you will be presented with a modal window. This is where you will add the remote server details, such as the IP address, as well as other Display settings required for a successful RDP connection.
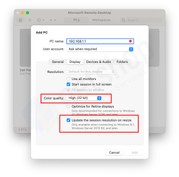
Next, click the “Display” tab and adjust the Color quality into “High (32 bit)”. Also ensure that your checkboxes are as per the screenshot below to ensure a successful RDP connection to your Windows Server.
This is it! Click the “Add” button to save the new connection. To connect on your remote Windows server double click the new connection.
Enjoy!


