Plesk is a commercial web hosting and server data center automation control panel which can be installed on both Linux and Windows servers (vps or dedicated).
In this article we will go through 2 easy ways on how to install Plesk on a Linux CentOS 7 server. For the purpose of this example, we will be using a UK VPS with 2GB RAM, 2 vCPU and 60GB SSD (order this plan).
Option 1: Install Plesk on CentOS using CLI (command line)
Prerequisite for following the next steps is to execute all commands as root.
Step 1: Install all necessary packages
yum install wgetStep 2: Download and Run the Plesk Installer
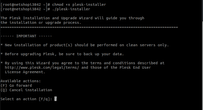
cd /rootwget http://autoinstall.plesk.com/plesk-installerchmod +x plesk-installer./plesk-installerAt this point you will be prompted with some questions, as shown in the screenshot below. It is safe to proceed with the default options Go Forward (F).
The whole installation process should take 10 – 15 minutes. Grab a coffee and watch the magic!
Step 3: Complete the configuration process
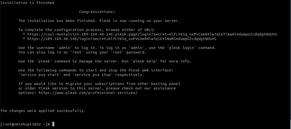
As soon as the installation is completed, you will see a message like the one below:
Copy & paste the URL in your browser as per the instructions. In that page you will be asked to enter your e-mail address, a password which you will use to access the Plesk UI, and the type of the license.
Option 2: Automated Plesk Installation via myNetShop Portal
Another option for lazy sysadmins or those who are not comfortable working with CLI, is to proceed with unattended Plesk installation via the myNetShop portal (Not a Customer yet? Sign Up Free).
Step 1: Login to your myNetShop Portal
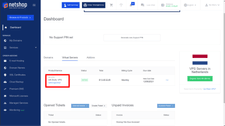
In your browser type https://my.netshop-isp.com.cy and use your credentials to access our self-service portal. Upon login you will be landed in the Dashboard page.
Assuming you have placed an order for a VPS Server, follow the next steps as shown in our screenshots.
Step 2: Access the VPS Management page
Click the hostname of your VPS Server to enter the VPS management page.
Step 3: Install Plesk Control Panel
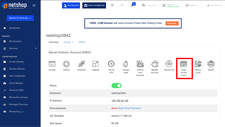
From the VPS management options, click the button “Install Control Panel” and then choose “Plesk” from the drop down list.
Click “Install” and then you will be redirected back to the VPS management page, where you can monitor the progress of the Plesk installation on your Linux VPS.
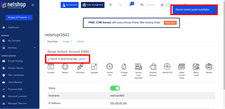
Allow 10-20 minutes and then hit refresh. Once the plesk installation is completed, the message “Server is performing task” will disappear and you can access your Plesk control panel as follows:
https://ip_address_of_your_server:8443


