


Debian Linux 10 “Buster” has been released as a stable release version which offers updated packages and five years of support. As per a popular demand by our customers we are explaining in this article, an easy way on how to upgrade your VPS or Dedicated server from Debian 9 to Debian 10 using command line.
Before getting our hands on to the commands, let’s see what’s new in Debian 10 “Buster” version:
- Updated desktop environments such as Cinnamon 3.8, GNOME 3.30, KDE Plasma 5.14, LXDE 0.99.2, LXQt 0.14, MATE 1.20, Xfce 4.12.
- Secure Boot support greatly improved
- AppArmor is installed and enabled by default
- Apache
- BIND
- Chromium
- Emacs
- Firefox
- GIMP
- GNU
- GnuPG
- Golang
- Inkscape
- LibreOffice
- Linux
- MariaDB
- OpenJDK
- Perl
- PHP
- PostgreSQL
- Python
- Ruby
- Rustc
- Samba
- systemd
- Thunderbird
- Vim
Let’s start!
Step 1. Backup your Server
Data backup and/or full server snapshot is strongly recommended prior proceeding to the Debian upgrade.
With Acronis Cloud Backup you can take secure backup of files/folders or even a full snapshot of the Operating system for both virtual/cloud and bare-metal systems.
Customers of NetShop ISP enjoy a fully managed cyber protection service which means that we can install the Acronis backup agent and help you take a full backup of your server.
As soon as you complete the backup process, you may proceed to the next steps below.
Step 2. Update existing installed packages
Before upgrading your Debian server, all security patches and pending upgrades of your Debian 9 environment must be fully updated. Use the commands below to do this:
sudo apt update
sudo apt upgrade
sudo apt full-upgrade
sudo apt --purge autoremove
OR
sudo apt-get update
sudo apt-get upgrade
sudo apt-get full-upgrade
sudo apt-get --purge autoremove
Once the above are completed, you need to Reboot your Debian 9 server for all the changes to be applied and the kernel to be updated:
sudo rebootStep 3. Update the Debian Repository in the /etc/apt/sources.list file
At this point you need to update the APT’s source-list files. To view the current settings, use the following command:
cat /etc/apt/sources.listYou should see something like this:
deb http://cdn-aws.deb.debian.org/debian stretch main
deb http://security.debian.org/debian-security stretch/updates main
deb http://cdn-aws.deb.debian.org/debian stretch-updates main
The word “stretch” that you see above indicates that your Debian installation is using the old version. Therefore, you now need to change all references in the /etc/apt/sources.list file from ‘stretch’ to ‘buster’. We will do this by using the ‘magic’ sed command. Alternatively, you can do it manually with your favorite editor (such as nano or vi).
Create a backup copy of the files first:
sudo cp -v /etc/apt/sources.list /root/
sudo cp -rv /etc/apt/sources.list.d/ /root/
Now let’s replace the strings ‘stretch’ to ‘buster’ using the sed command:
sudo sed -i 's/stretch/buster/g' /etc/apt/sources.list
sudo sed -i 's/stretch/buster/g' /etc/apt/sources.list.d/*
Now let's update the Debian system's packages as follows:
sudo apt updateStep 4. Minimal system upgrade
At this point we are ready to proceed with the Debian OS upgrade. We will do this in two steps in order to avoid the removal of large numbers of packages which you want to keep:
sudo apt upgradeSample Outputs:
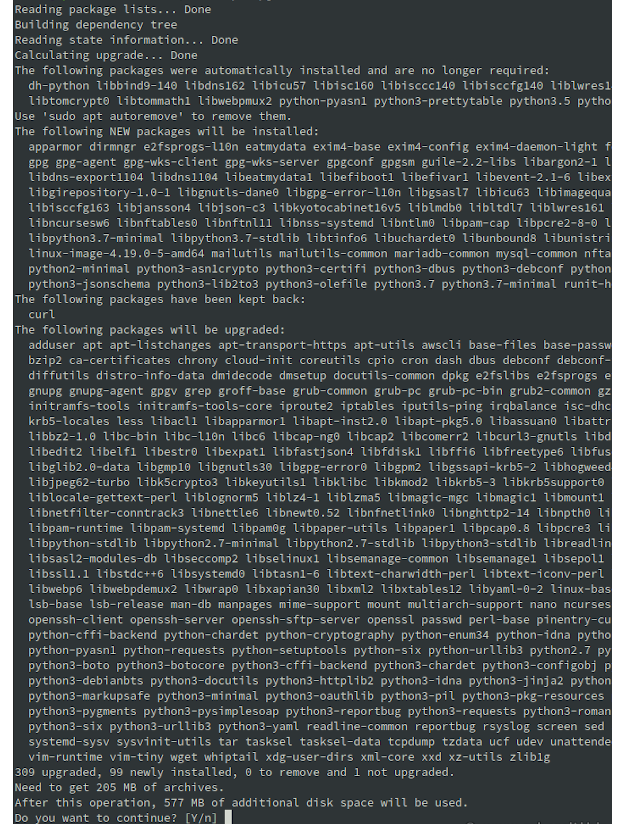
During the upgrade process, a screen might appear which will list all the upcoming changes. Just press ‘q’ to exit and proceed.
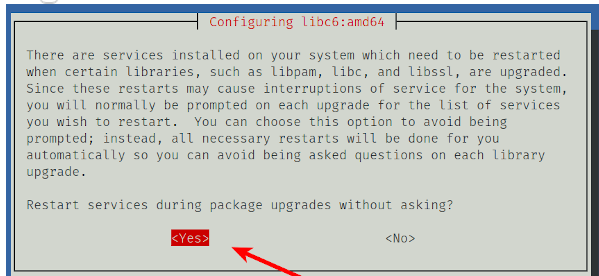
Once you are prompted with a screen asking you to ‘Restart services during upgrade without asking’ choose ‘Yes’
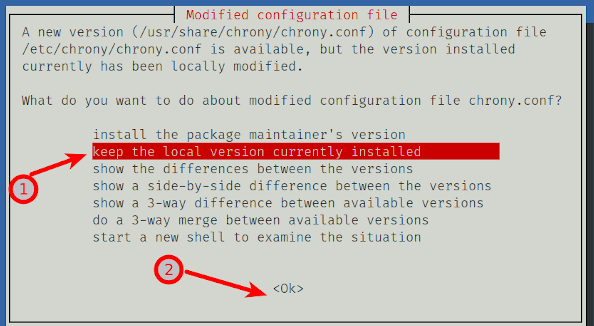
A new screen will be prompted asking you which version of chrony.conf you wish to keep. Choose the second option as shown in the screenshot below and hit ‘Ok’
Step 5. Upgrading Debian 9 to Debian 10
Completing Step 4 means that we are done with the minimum upgrades. Now let’s proceed to the full upgrade of Debian 9 to Debian 10. Using the following command the system will start its full upgrade process to install the newest available versions of all packages, and have all possible dependencies resolved.
sudo apt full-upgradeOnce prompted if you wish to continue, press ‘Y’ and hit Enter.
Upon completion of the upgrade process, you need to reboot your Debian server as follows:
sudo rebootStep 6. Verify Upgrade
As soon as your server is back online after the last reboot, you are ready to confirm that Debian OS has been upgraded to version 10. Use the following commands:
uname -r
lsb_release -a
Sample Outputs:
No LSB modules are available.
Distributor ID:	Debian
Description:	Debian GNU/Linux 10 (buster)
Release:	10
Codename:	buster
Now, as a very last step you need to clean up all outdated packages that remained. Use this command:
sudo apt --purge autoremoveCongratulations! Your Debian 9 ‘Stretch’ server has now been upgraded to Debian 10 ‘Buster’!
If you are a NetShop ISP customer, experiencing any issues with the above process, or you wish to have our technical team do it for you, simply contact us via Livechat or open a Support ticket through the myNetShop portal.