


Often paired together, cPanel control panel is amongst the most popular web-based platforms for website and hosting management, whilst WHM is a server management tool used to manage multiple cPanel accounts.
In this article we will provide a step-by-step guide to installing cPanel and WHM on your AlmaLinux 8 Server.
Prerequisites
In order to follow this guide, you will need the following:
- AlmaLinux 8 freshly installed on your server
- Minimum 1 GB RAM and minimum 20 GB disk space (read official hardware requirements by cPanel)
- Shell access to your AlmaLinux 8 machine with a root-privileged user
- cPanel/ WHM license (15-day trial period if this is a new installation of cPanel & WHM)
Steps to Install cPanel on AlmaLinux 8
For all following commands we assume you are logged in with root user. If not, switch to root account using command sudo -i
Step 1: Disable Firewall
It is advised that you disable the firewall on your AlmaLinux server. Run the following command to save the current firewall rules to file, and then disable firewall.
root@localhost:~$ iptables-save > ~/firewall.rules
root@localhost:~$ systemctl stop firewalld.service && systemctl disable firewalld.service
Step 2: Disable SELinux
Since SELinux is incompatible with cPanel & WHM, you must disable it before you can proceed.
Update the contents of the /etc/selinux/config file to set the SELINUX parameter to disabled.
Use the command nano /etc/selinux/config to edit the file.
The expected contents of the file are as follows:
# This file controls the state of SELinux on the system.
# SELINUX= can take one of these three values:
# enforcing - SELinux security policy is enforced.
# permissive - SELinux prints warnings instead of enforcing.
# disabled - No SELinux policy is loaded.
SELINUX=disabled
# SELINUXTYPE= can take one of these two values:
# targeted - Only targeted network daemons are protected.
# strict - Full SELinux protection.
SELINUXTYPE=targeted
Save and close the file.
Now execute the following command to disable SELinux on your environment without requiring immediate server restart:
root@localhost:~$ setenforce 0Step 3: Set FQDN Hostname
It is important that you have set a Fully Qualified Domain Name as your server’s hostname. This will be your cPanel’s server hostname, the one you will be using to access WHM and cPanel panels from your browser.
Run the following command:
root@localhost:~$ hostnamectl set-hostname mycpanel.mydomain.comTo ensure your hostname is persistent after server restarts, edit the following file and enter your desired hostname. Then save & close the file.
root@localhost:~$ nano /etc/hostnameIMPORTANT: Your server’s hostname must be resolving to the IP address of your server. You can do so by creating a DNS “A” record from within your Domain/DNS registrar portal.
Step 4: Install necessary packages
In order for the installation script for cPanel & WHM to run successfully, Perl must be installed. Run the following command to install Perl.
root@localhost:~$ yum install perl curl wget -yStep 5: Download & Run cPanel Installer
Run the following command to fetch and run the cPanel & WHM installation script.
root@localhost:~$ cd /home && curl -o latest -L https://securedownloads.cpanel.net/latest && sh latestThis should take a while to complete. Once it does, cPanel & WHM have been successfully installed!
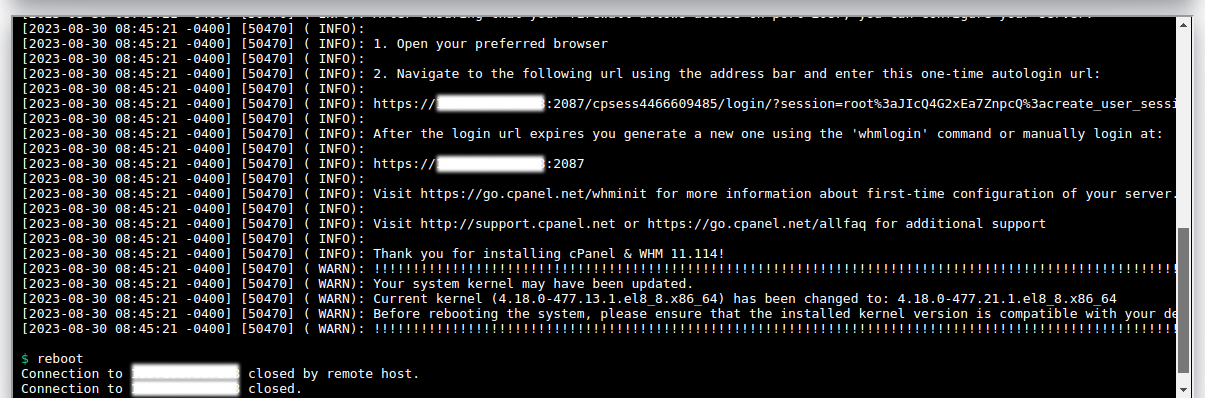
You can now access WHM GUI from your browser using the server hostname or server IP address in order to finish the necessary setup and fine tuning. The following hostnames and IPs are given as an example.
Step 6: Access WHM GUI to Finish Setup
Open your browser and enter any of the following addresses. If you have followed all above steps, all should work.
https://mycpanel.mydomain.com/whm
https://mycpanel.mydomain.com:2087
You can also replace the hostname part with your server’s IP address, for example https://192.168.1.100/whm