










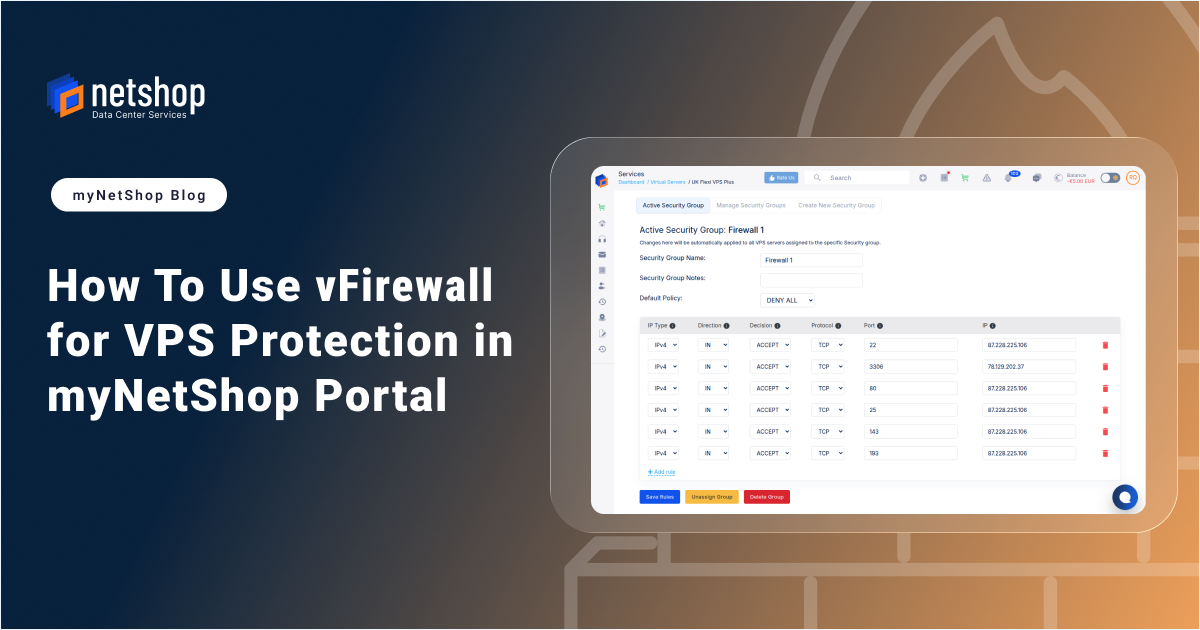

NetShop ISP has launched vFirewall – a new feature which allows customers to easily manage traffic rules for VPS servers.
In this tutorial, we’ll walk you through the process of creating, managing, and applying firewall rules step by step.
Step 1: Create a New Security Group
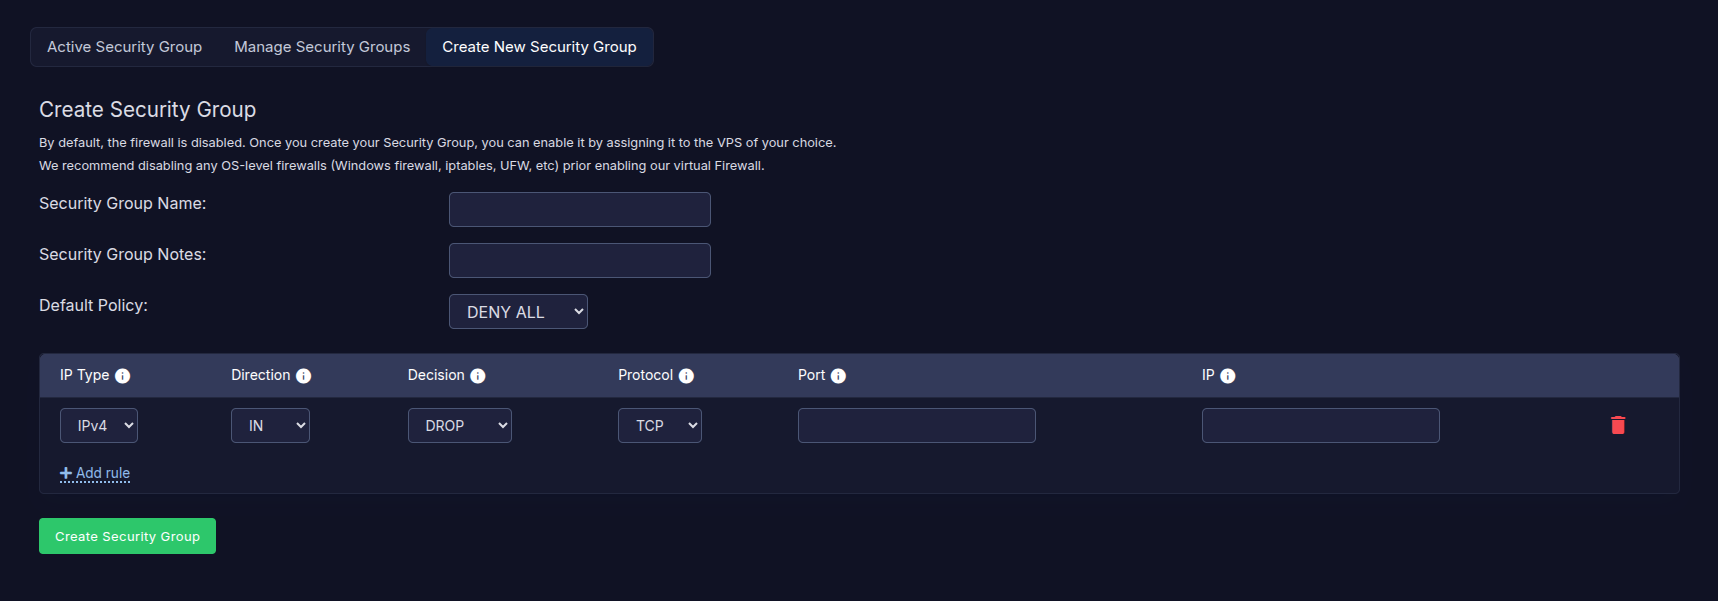
Before applying firewall rules to your VPS, you must first create a Security Group. A Security Group is a collection of rules that define which traffic is allowed or blocked.
- Navigate to the Firewall section in your client portal.
- Click on Create New Security Group.
- Fill in the following fields:
- Security Group Name – Choose a descriptive name (e.g., WebServerRules).
- Security Group Notes – Optional notes for internal reference.
- Default Policy – Select the default behavior:
- Allow All – Permits all traffic unless explicitly denied.
- Deny All – Blocks all traffic unless explicitly allowed (recommended for best security).
- Add rules by specifying:
- IP Type – IPv4 or IPv6.
- Direction – Incoming (IN) or Outgoing (OUT).
- Decision – Allow (ACCEPT) or Block (DROP).
- Protocol – TCP, UDP, ICMP, etc.
- Port – Enter a port (e.g., 22 for SSH) or a range (e.g., 80–443 for web traffic).
- IP – Define a source/destination IP or use
0.0.0.0/0for all.
- Click Create Security Group to save.
Step 2: Manage Security Groups
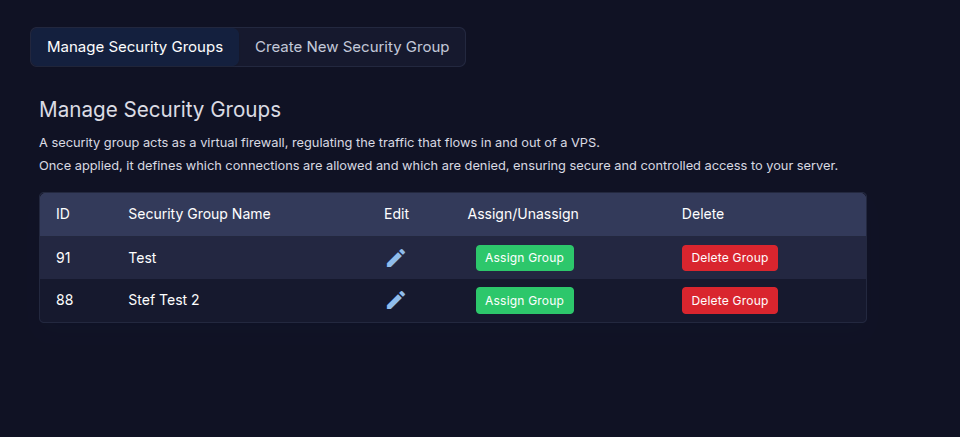
Once created, Security Groups can be managed under the Manage Security Groups tab. This is where you can edit, assign, or delete groups.
In this section you have the following options available:
- Edit (✏️) – Update rules, name, or notes.
- Assign/Unassign Group – Attach/detach a Security Group to/from a VPS (only one active group per VPS).
- Delete Group (🗑️) – Remove a Security Group permanently.
📌 Tip: Do not delete a Security Group currently assigned to an active VPS unless you intend to remove its protection.
Step 3: Edit Security Group
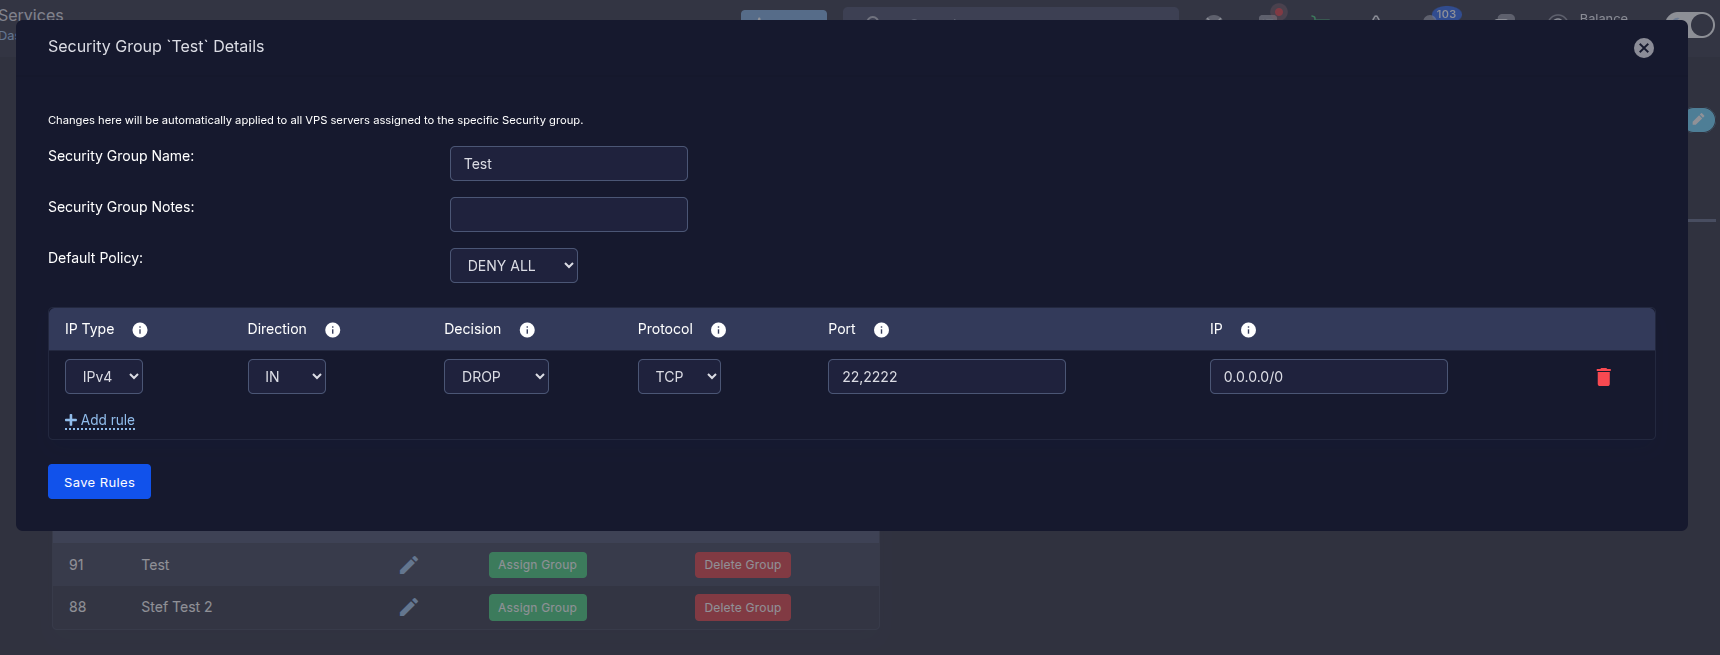
You may update an existing Security Group at any time:
- From Manage Security Groups, click the Edit (✏️) icon.
- Update group name, notes, or default policy.
- Modify rules:
- Add new rules or update existing ones.
- For example, allow SSH on ports
22,2222for all IPs (0.0.0.0/0).
- Click Save Rules to apply changes. Updates take effect immediately for all VPS servers assigned to this group.
Step 4: Active Security Group
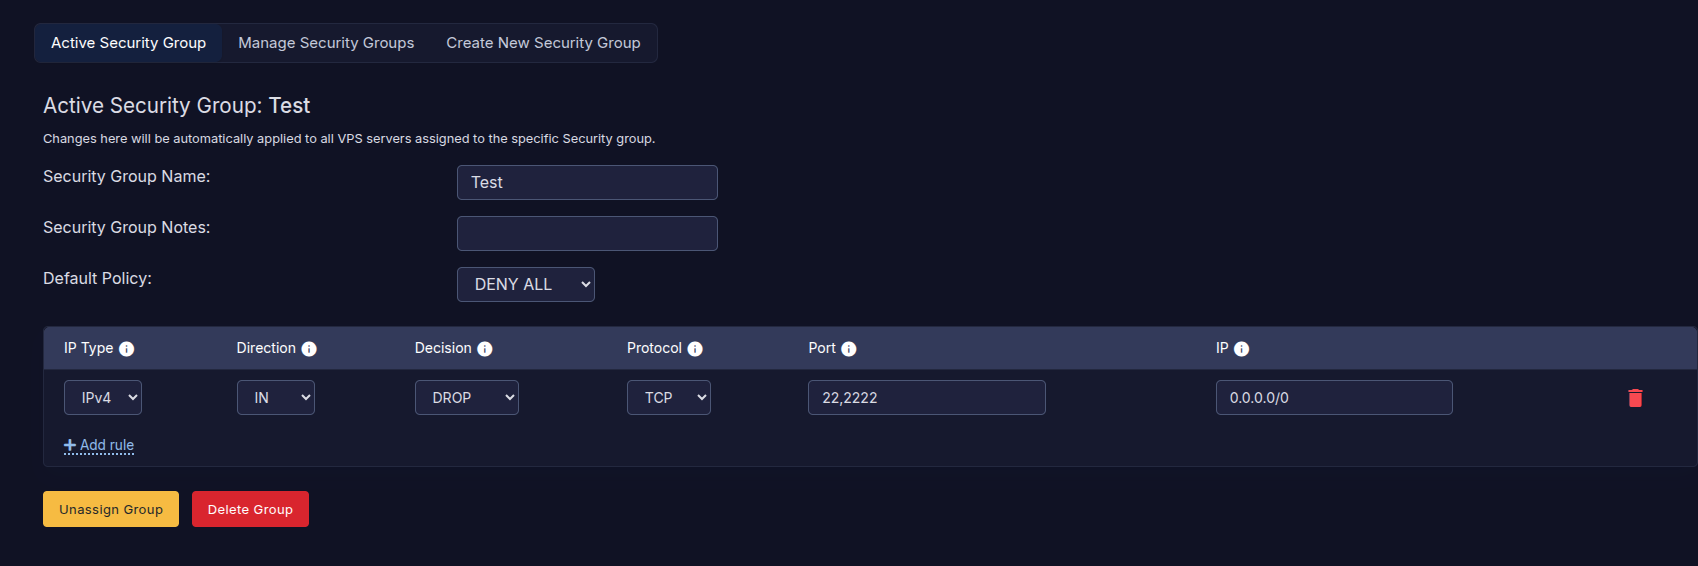
When a Security Group is assigned to a VPS, it becomes the Active Security Group. All traffic filtering will be applied in real-time according to the rules defined.
In this section the following options are available:
- Add/Modify Rules – Adjust traffic filtering directly.
- Unassign Group – Detach the firewall rules from the VPS.
- Delete Group – Permanently remove the group and its rules.
📌 Tip: Double-check that SSH (port 22) or RDP (port 3389) access is allowed before enabling a Deny All policy to avoid locking yourself out.