


An SSL certificate is a digital certificate that authenticates a website’s identity and enables an encrypted connection. SSL stands for Secure Sockets Layer, a security protocol that creates an encrypted link between a web server and a web browser. The connection becomes from the not secure http:// to the secure https:// URL.
In this tutorial we will demonstrate how to generate and install a Commercial SSL Certificate Product on cPanel Lite Service. The main steps of the procedure are the follow :
- Generate the CSR in cPanel
- Upload CSR in portal – Generate SSL Certificate
- Install SSL Certificate.
Prerequisites
The following are required to execute the task:
- An account on my.netshop-isp.com.cy: For the purposes of this tutorial, a demo account was created: netshop-tutorials@netshop-isp.com.cy.
- A cPanel Lite Service: A Cyprus cPanel Lite Web Hosting product was purchased from my.netshop-isp.com.cy website. The product is hosted on https://athena.netshop-isp.com.cy:2083/
- A domain: The domain ssldesk.com was purchased and associated with the cPanel service for this tutorial.
- A Commercial SSL Certificate: A RapisSSL Certificate addon was acquired.
Let’s get started on how to install SSL Certificate on your cPanel account.

Step 1: Generate the CSR
The first step is to generate the CSR. A CSR (certificate signing request) is one of the first steps towards getting your own SSL certificate. Generated on the same server you plan to install the certificate on, the CSR contains information (e.g. common name, organization, country) the Certificate Authority (CA) will use to create your certificate.
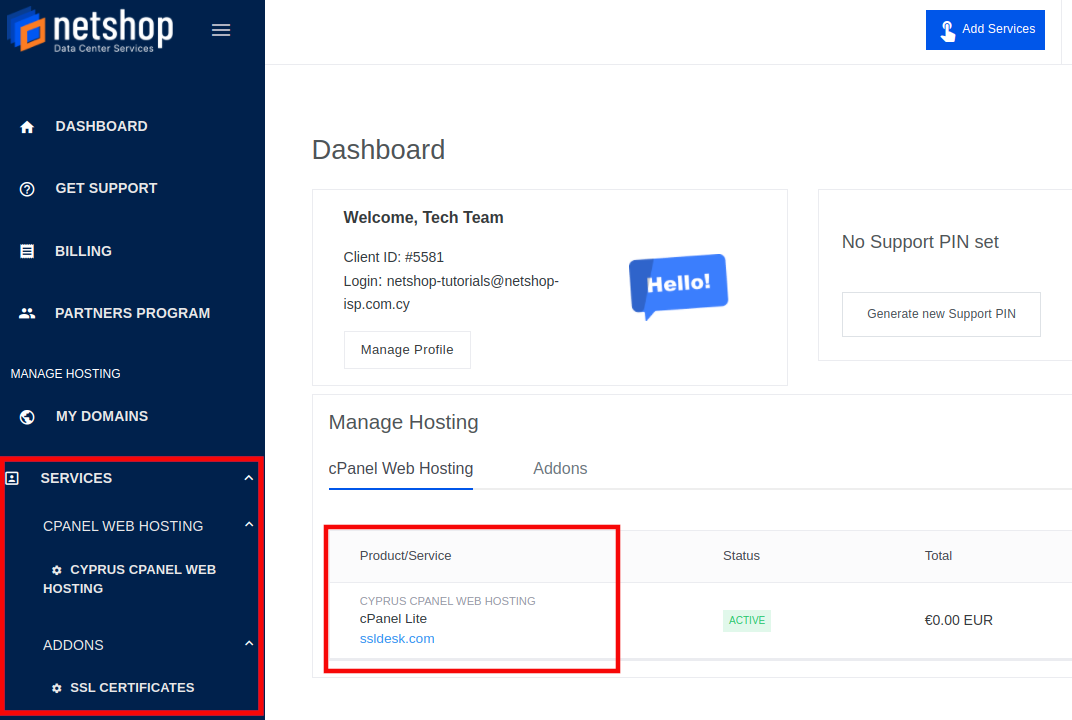
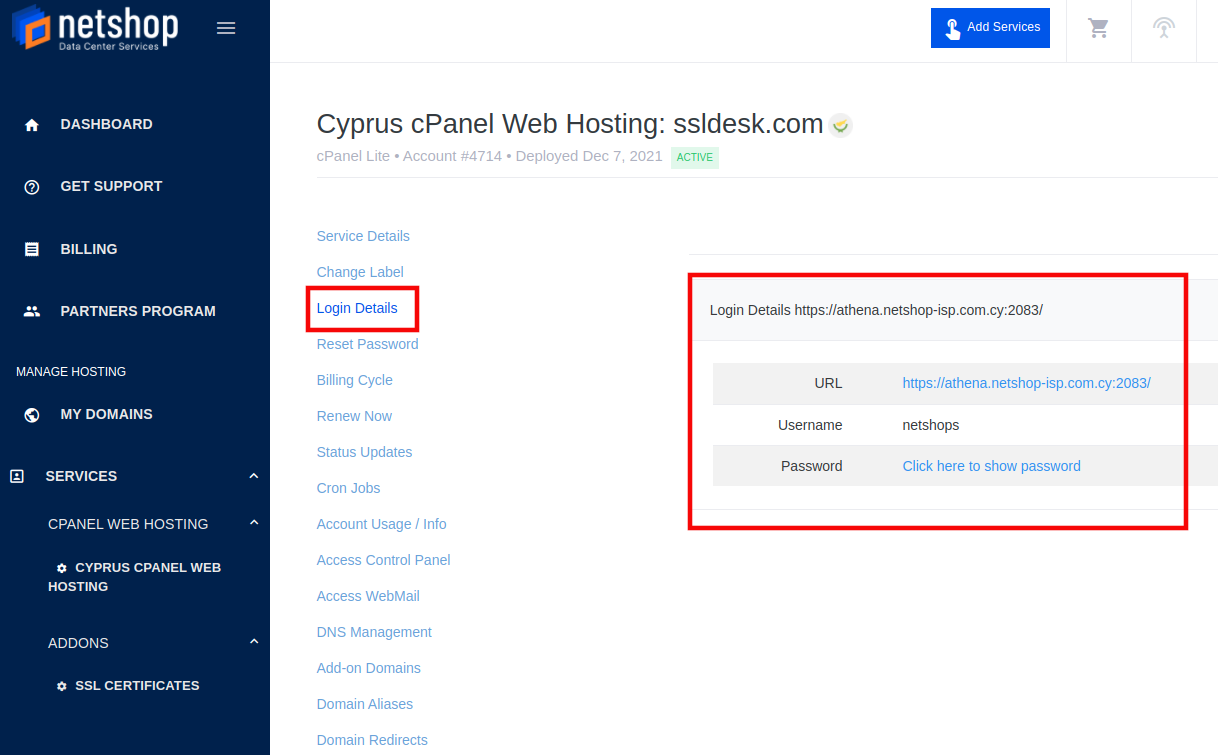
a. Login to your my.netshop-isp.com.cy portal and access your cPanel Lite Service. Through the main menu on the left, you can locate your services at the bottom. Select your cPanel Lite service.
b. Click on the Login Details option to find the URL (https://athena.netshop-isp.com.cy:2083/) where your service is hosted, along with the credentials to access you account. Click on the URL to access cPanel and use the credentials to login into your cPanel account.
c. Once you are inside your cPanel account, scroll down to find SSL/TLS option under SECURITY tab.
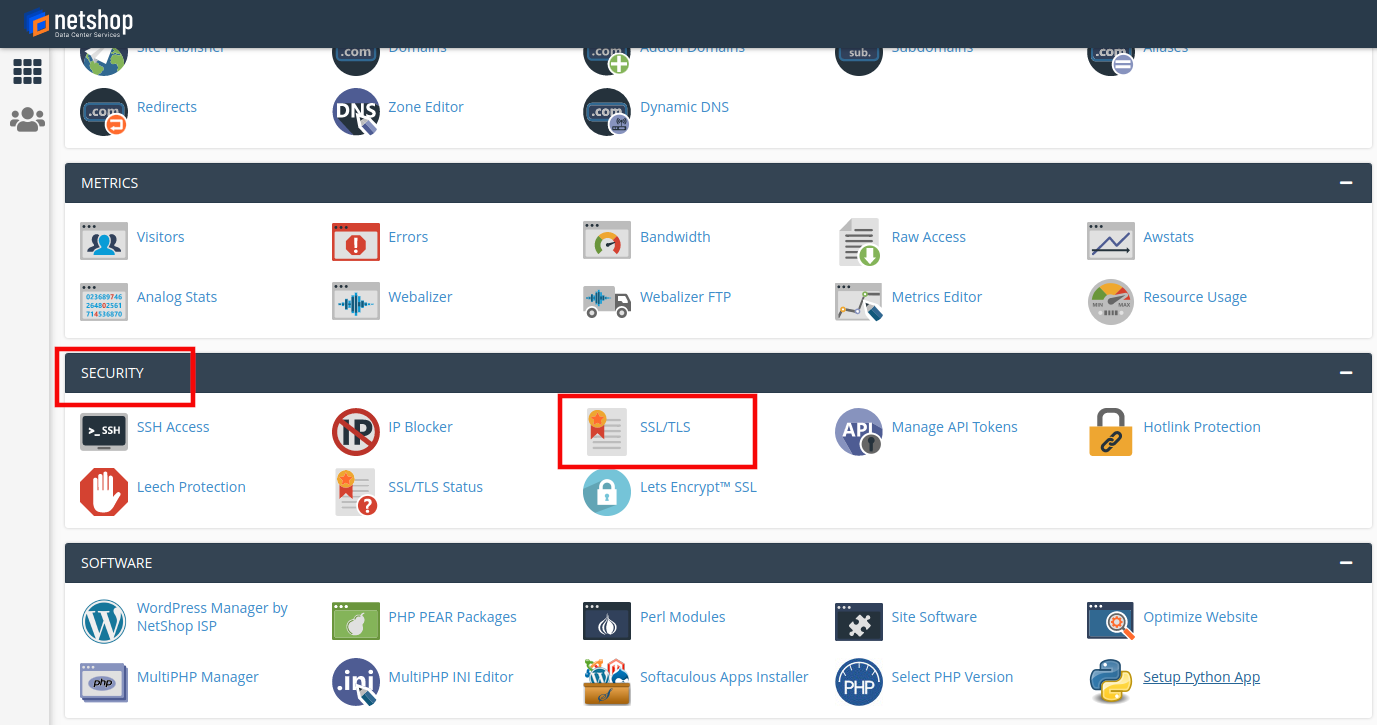
d. Next, click on the Certificate Signing Requests (CSR) on the right.
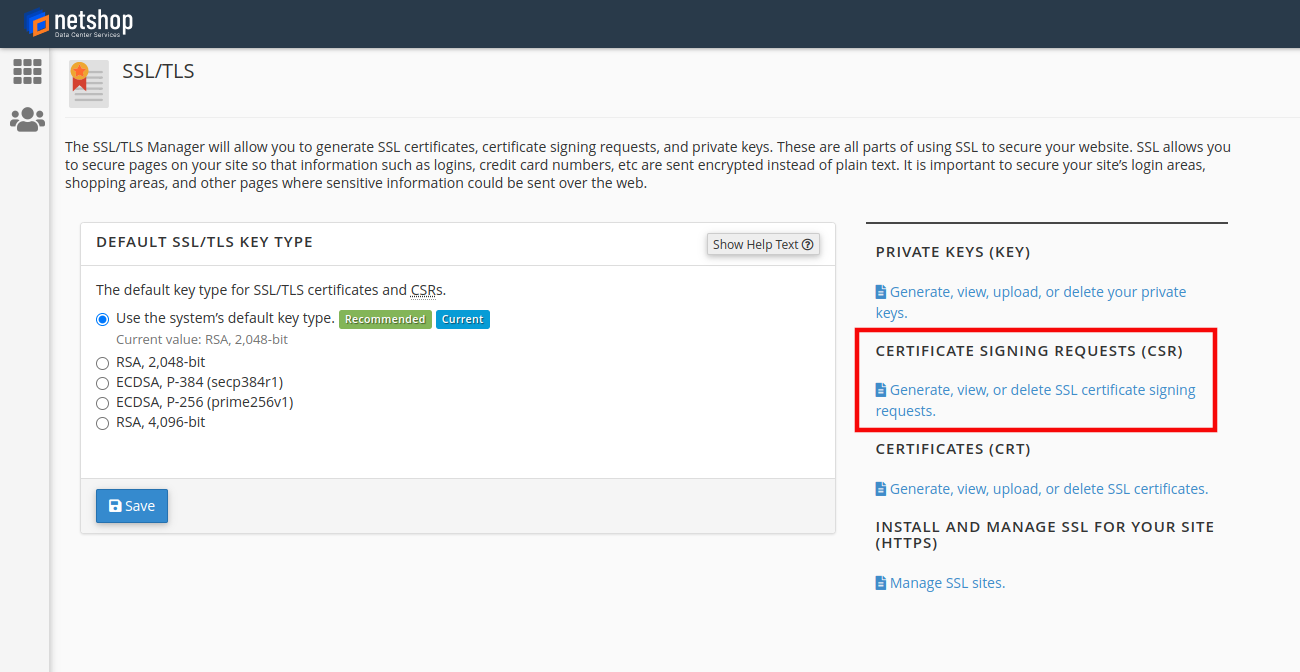
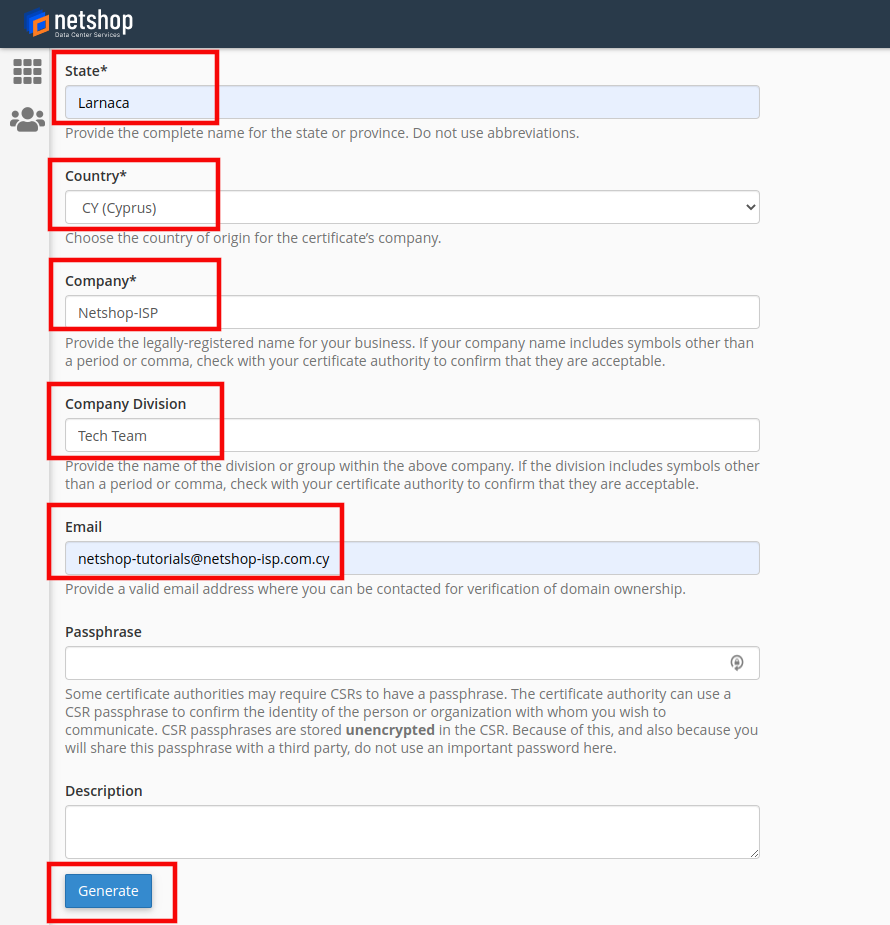
On the next page, you must fill some mandatory fields that will be used to generate your unique CSR.
d.1. Key: A mandatory field where you can select “Generate a New 2048-bit key” to generate a completely new Private Key, since this is the first time using the service.
d.2. Domains: A mandatory field you can add the domain(s) (example: ssldesk.com) you wish to secure. Keep in mind, ONLY Fully Qualified Domain Name(s) (FQDN) are valid.
If you purchased a Wildcard certificate, it should be represented with an asterisk in front of the domain (*.example.com). To create your CSR code for multiple domains, enter each domain in a new line.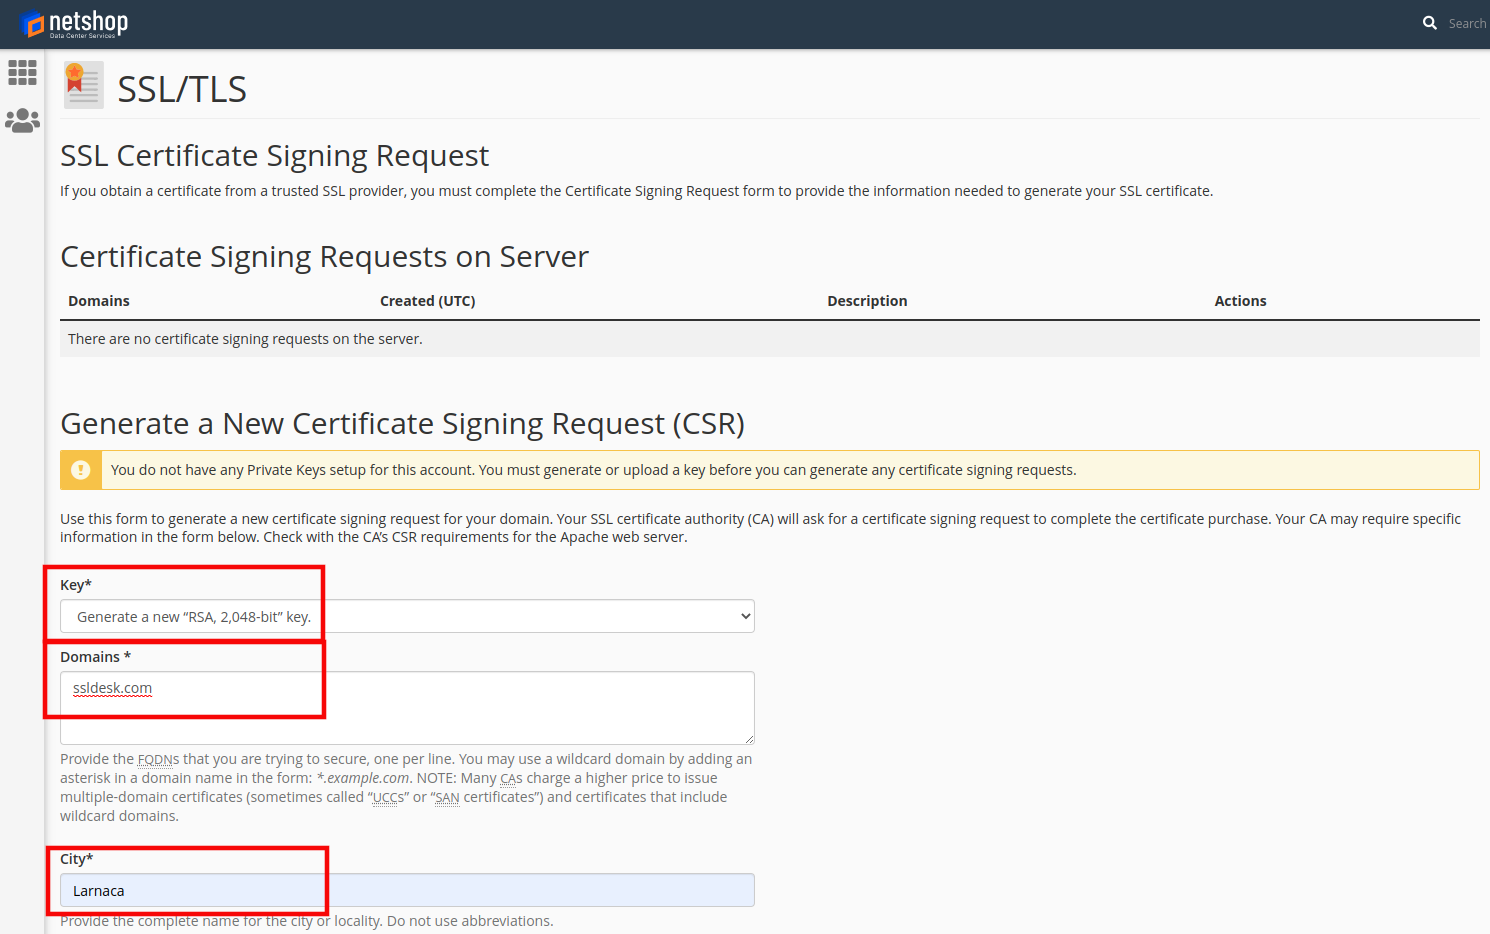
d.3. The next page will show the newly generated CSR. With the use of the generated Private Key and the information provided, the CSR Code is created. You can now use the Encoded Certificate Signing Request to activate the purchased SSL Certificate through my.netshop-isp.com.cy portal.
Keep the below Certificate tab open as we will need the Encoded Certificate Signing Request later on, or you can copy the contents of the Encoded CSR: box now to a notepad file for easier retrieval.You will have to copy the entire CSR from -----BEGIN CERTIFICATE REQUEST----- until the end, including -----END CERTIFICATE REQUEST----- when submitting the CSR code for SSL activation.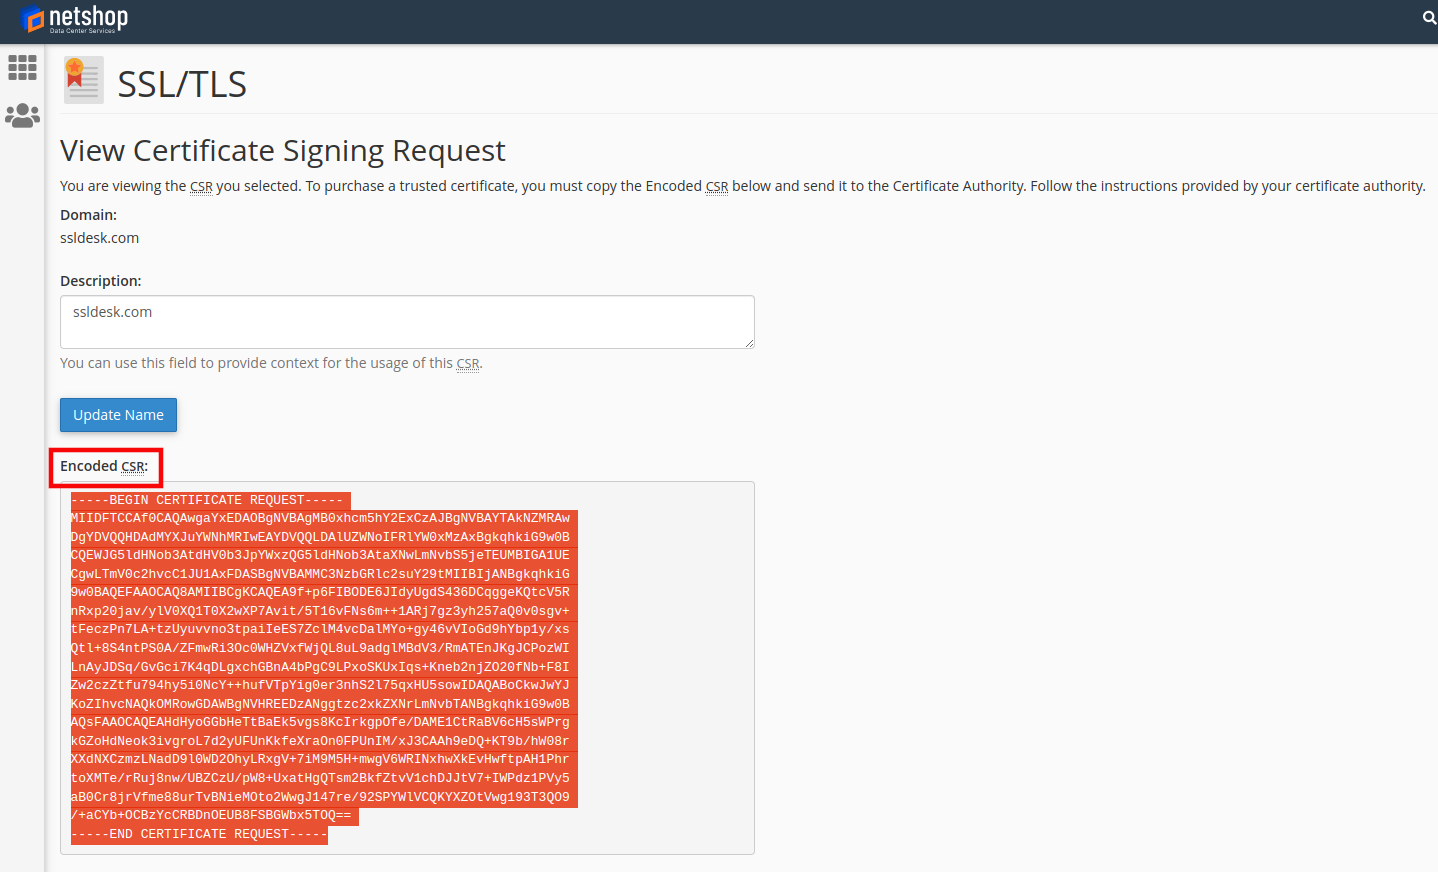
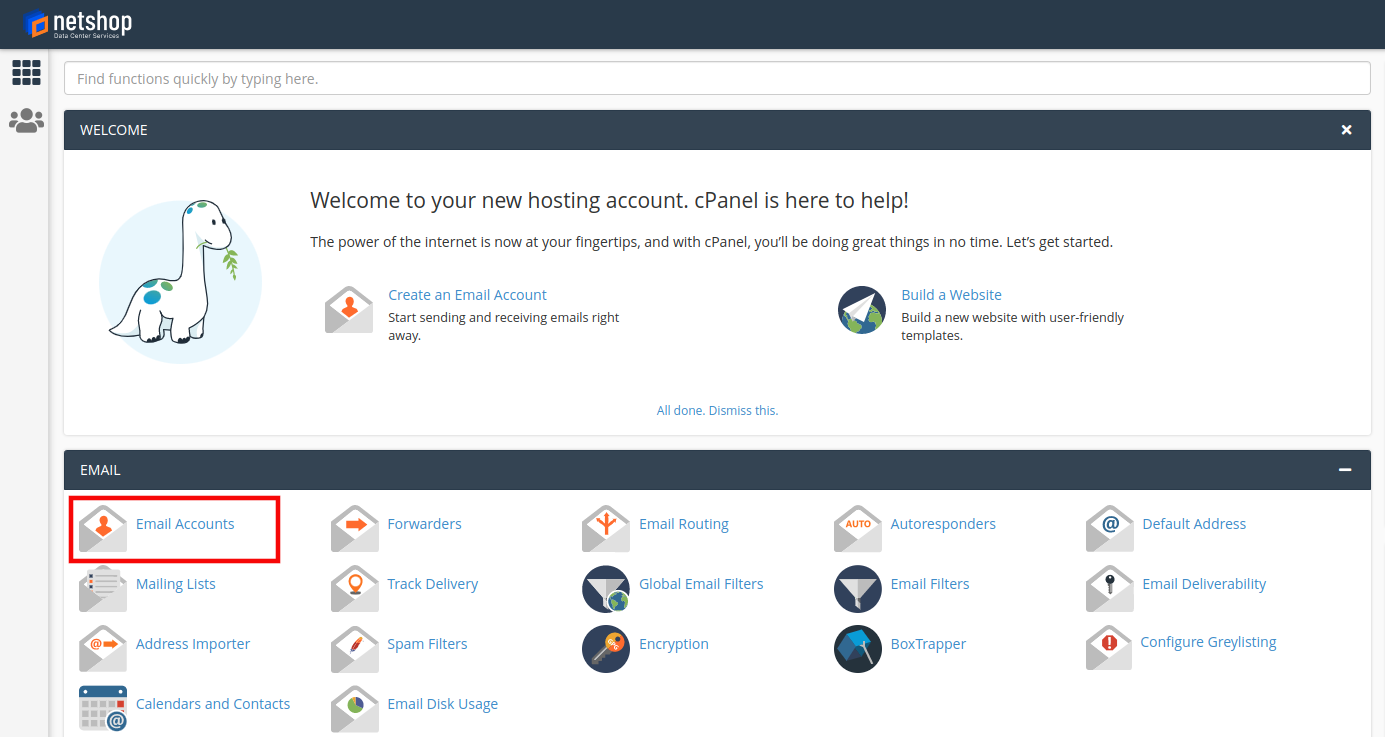
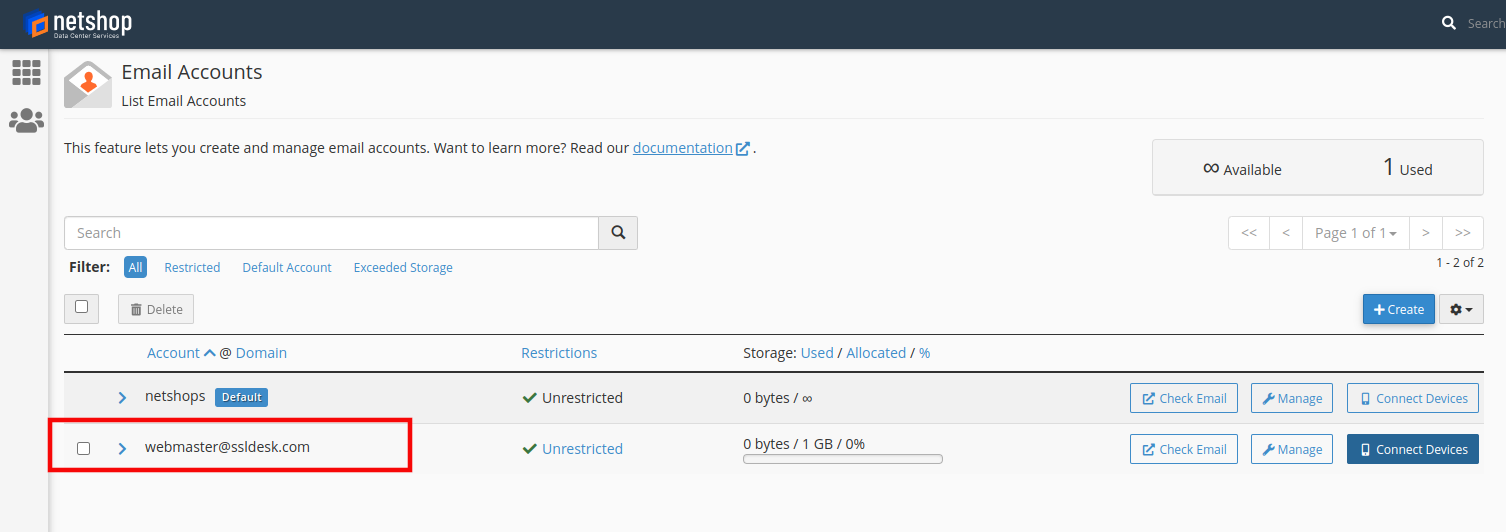
e. Before moving on to the next section (Upload CSR – Generate SSL), an email account should be created in cPanel to use it later for the domain validation and SSL request appoval (Upload CSR – Generate SSL, Step 4). Go back to the cPanel Dashboard and click on Email Accounts under EMAIL.
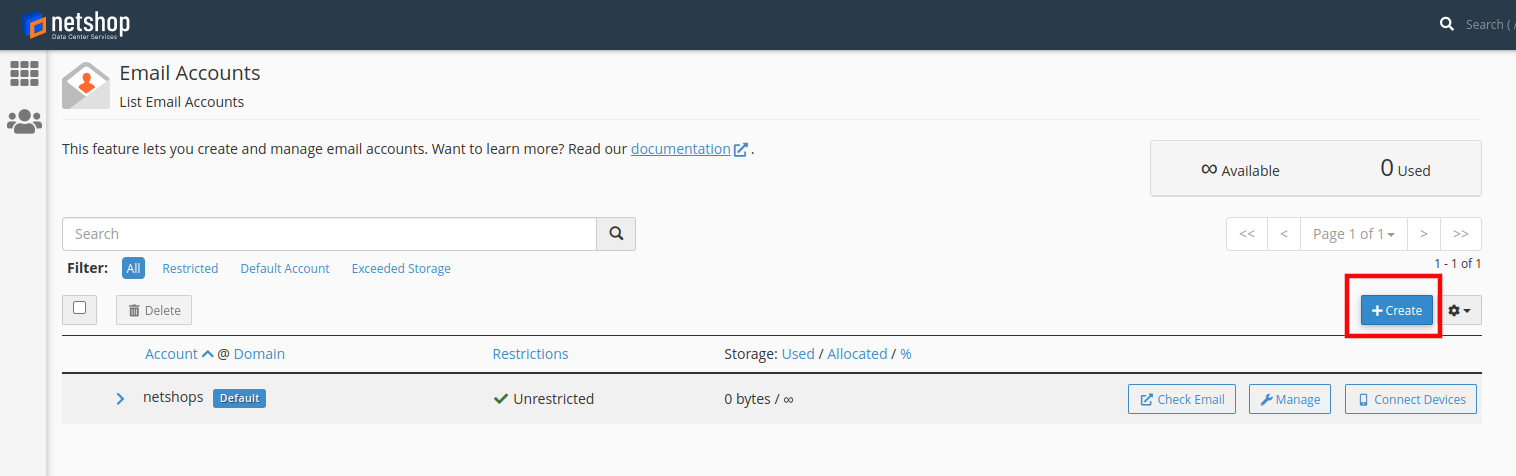
f. Then, click on the +Create button to create a new email account.
g. Add a Username and a Password in the respective fields and click the +Create button. For the username, you can choose between the reserved names: webmaster, administrator, admin, hostmaster or postmaster. In this example we have chosen webmaster@ssldesk.com. Instead of a password, you can send a login link to an alternate email address.

You can see that the new email is created under the current domain (@ssldesk.com).
Now that the CSR is generated and an email account is created, we can move on to the next section.
Step 2: Upload CSR in myNetShop Portal
In this step, we are going to use the CSR Code created in the previous steps and upload it in my.netshop-isp.com.cy portal. Then, we will approve the domain, activate the SSL through an email from the vendor and finally we can generate and download the SSL Certificate.
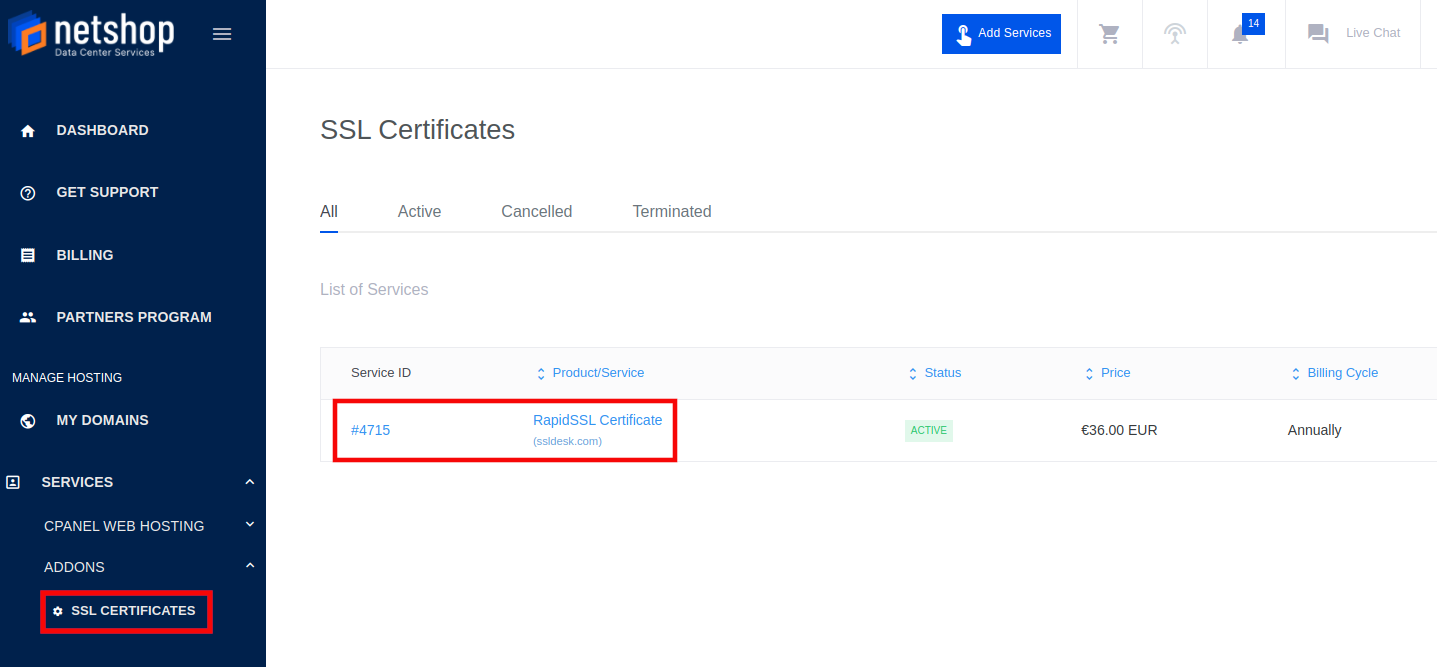
a. Log in to your my.netshop-isp.com.cy portal. Through the menu on the left, click on SSL CERTIFICATES under SERVICES -> ADDONS. Then click on the RapidSSL Certificate product.

Note that the Product/Service’ status is still pending. As soon as the SSL Certificate is generated, the status will become active.
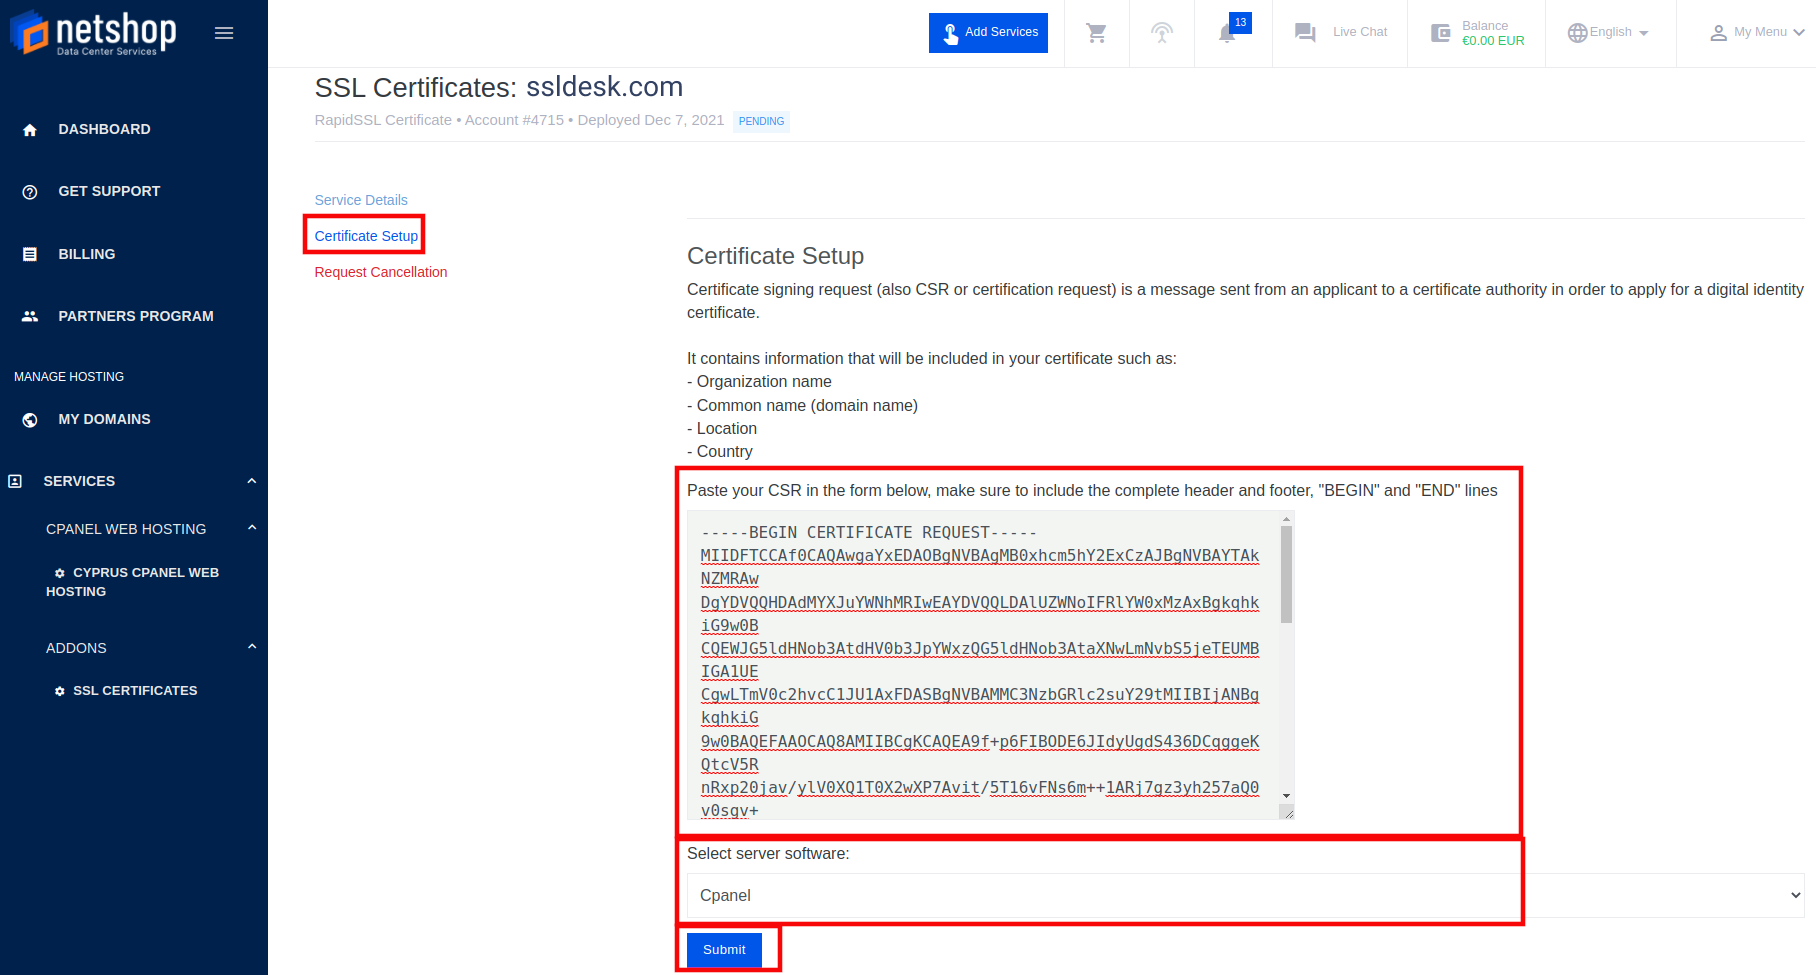
b. On the next page, click on the Certificate Setup on the left.
b.1. You will have to copy-paste (upload) the CSR Code generated earlier (Generate CSR – Step 5.12). If you didn’t keep the tab open or you didn’t copy it earlier, you can access the CSR Code from cPanel -> SSL/TLS -> CERTIFICATE SIGNING REQUESTS (CSR) under the Certificate Signing Requests on Server.
Reminder: You will have to copy the entire CSR from -----BEGIN CERTIFICATE REQUEST----- until the end, including -----END CERTIFICATE REQUEST----- when submitting the CSR code for SSL activation.b.2. Under the Select server software: , choose cPanel and then submit.
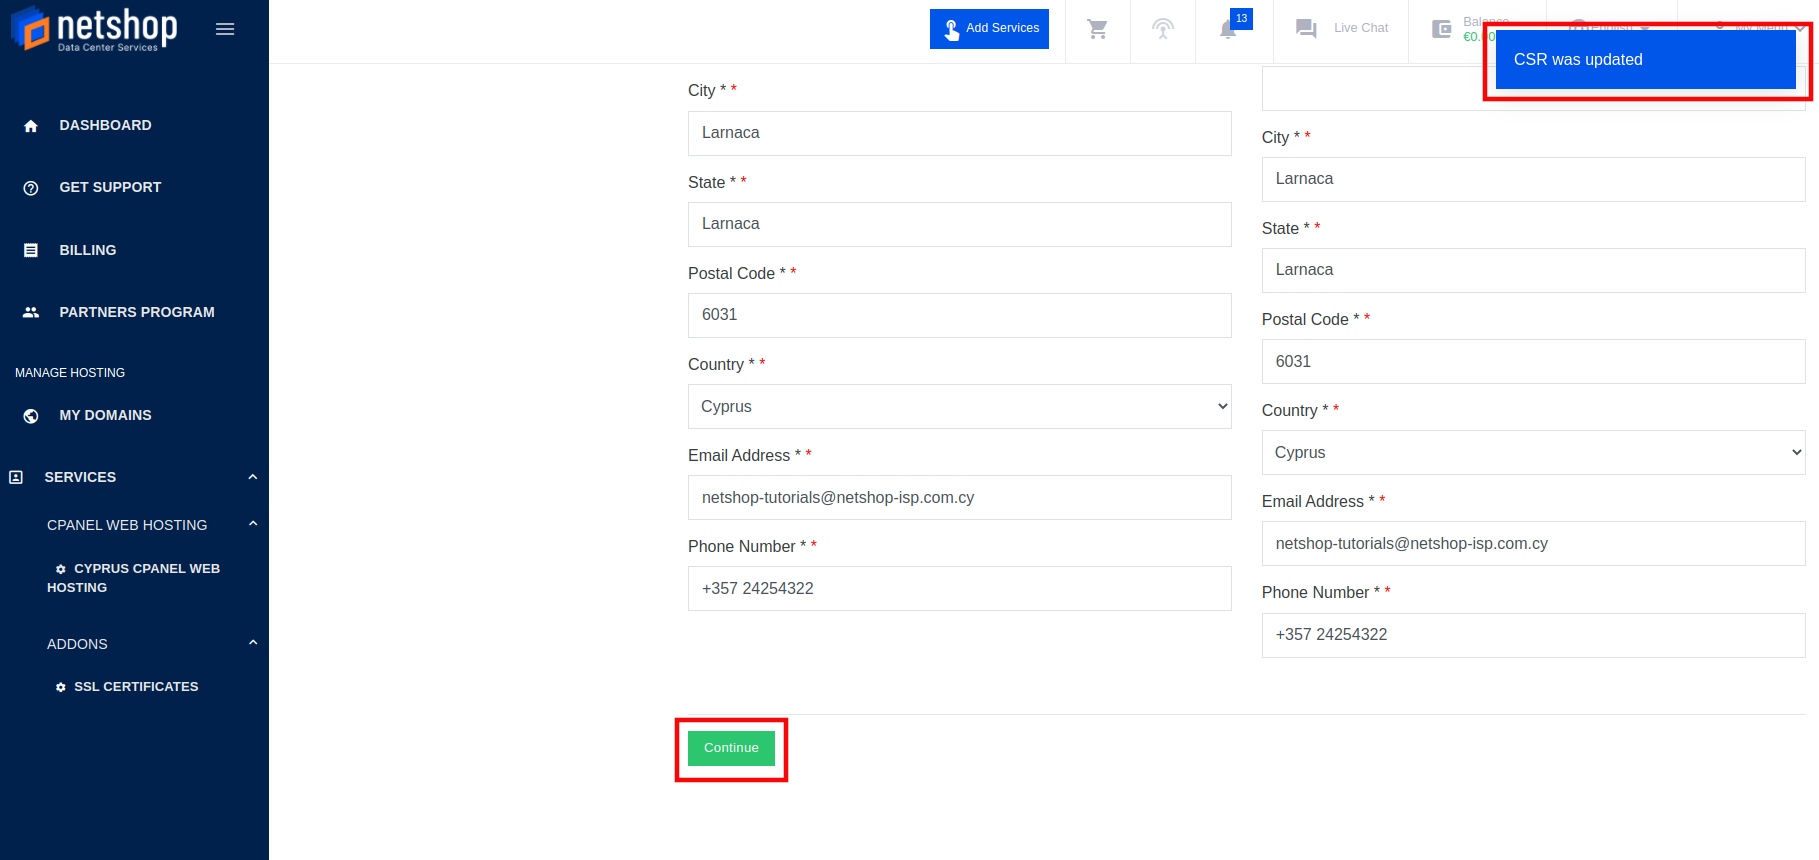
c. On the next page, you will see that the CSR information is uploaded. Also, at the top right of your browser you can see the pop up message that the CSR was updated. You need to check and verify the rest of the information and once done, scroll at the bottom and click the Continue button.
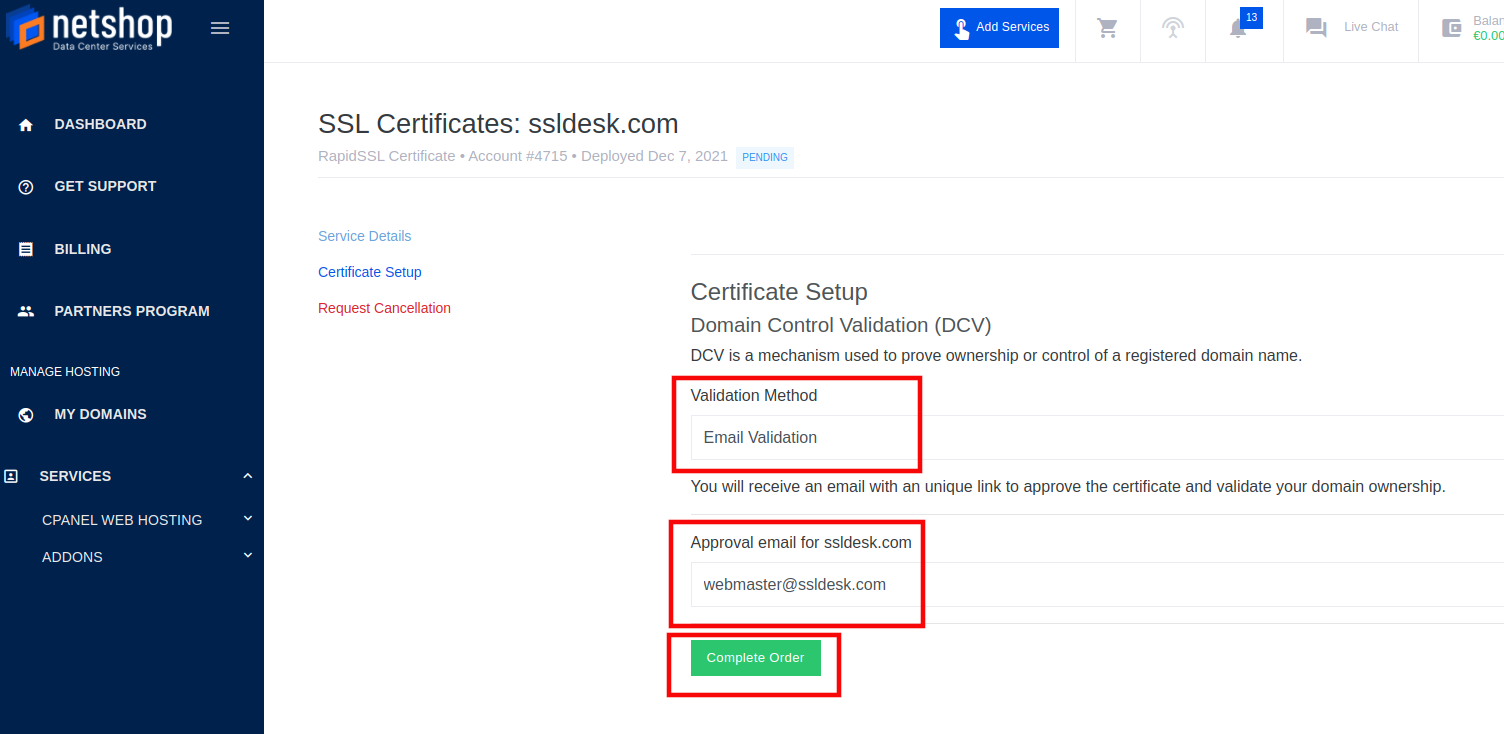
d. To complete the order, you have to choose the Validation Method. This is where the email webmaster@yourdomain.com (in our tutorial: webmaster@ssldesk.com) is needed. On the Validation Method field select Email Validation and on the Approval email for yourdomain.com field, choose the email account you have created earlier (Generate CSR – Step 8). Click the Complete Order button when finished.
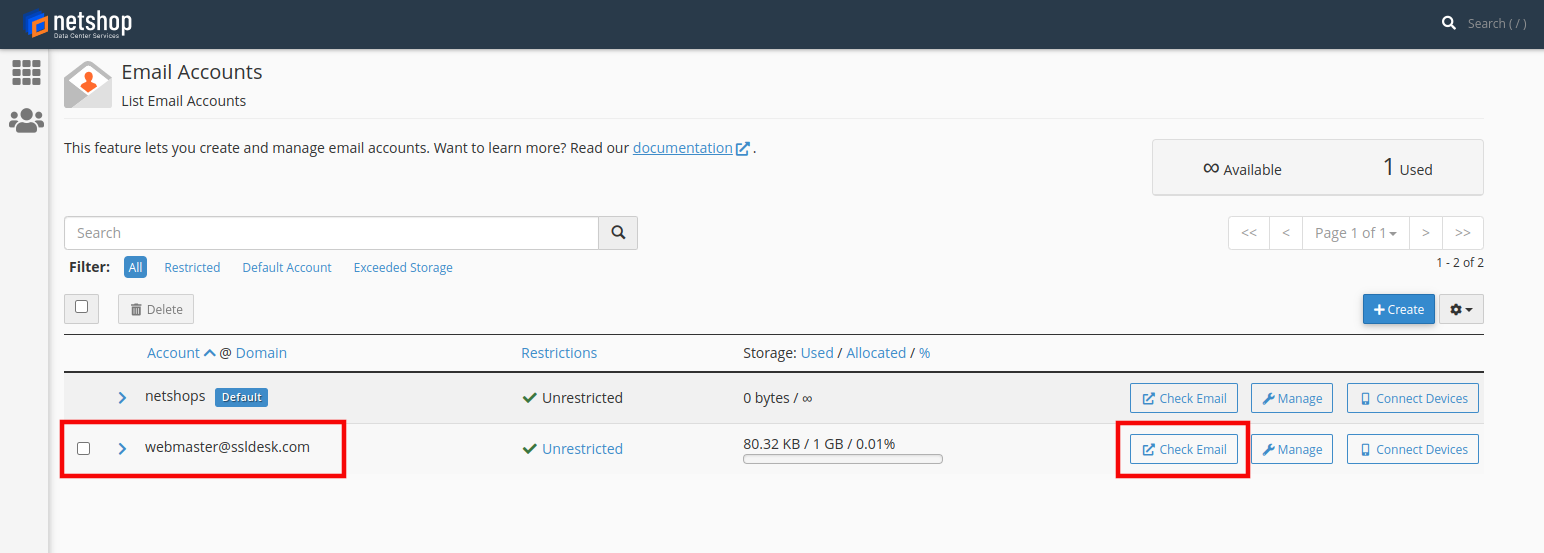
e. An email with a unique link will be send to the account specified. You need to access the inbox of the recently created email account (in our tutorial webmaster@ssldesk.com) to approve the certificate and validate your domain ownership. To access the inbox, go to your cPanel -> Email Accounts. Locate the email address (in this example: webmaster@ssldesk.com) and click Check Email.
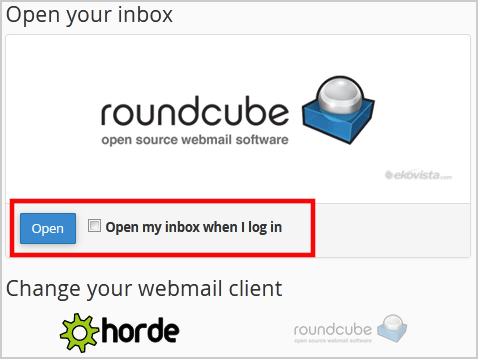
f. On the next page, click on the Open button and check the Open my inbox when I log in checkbox.
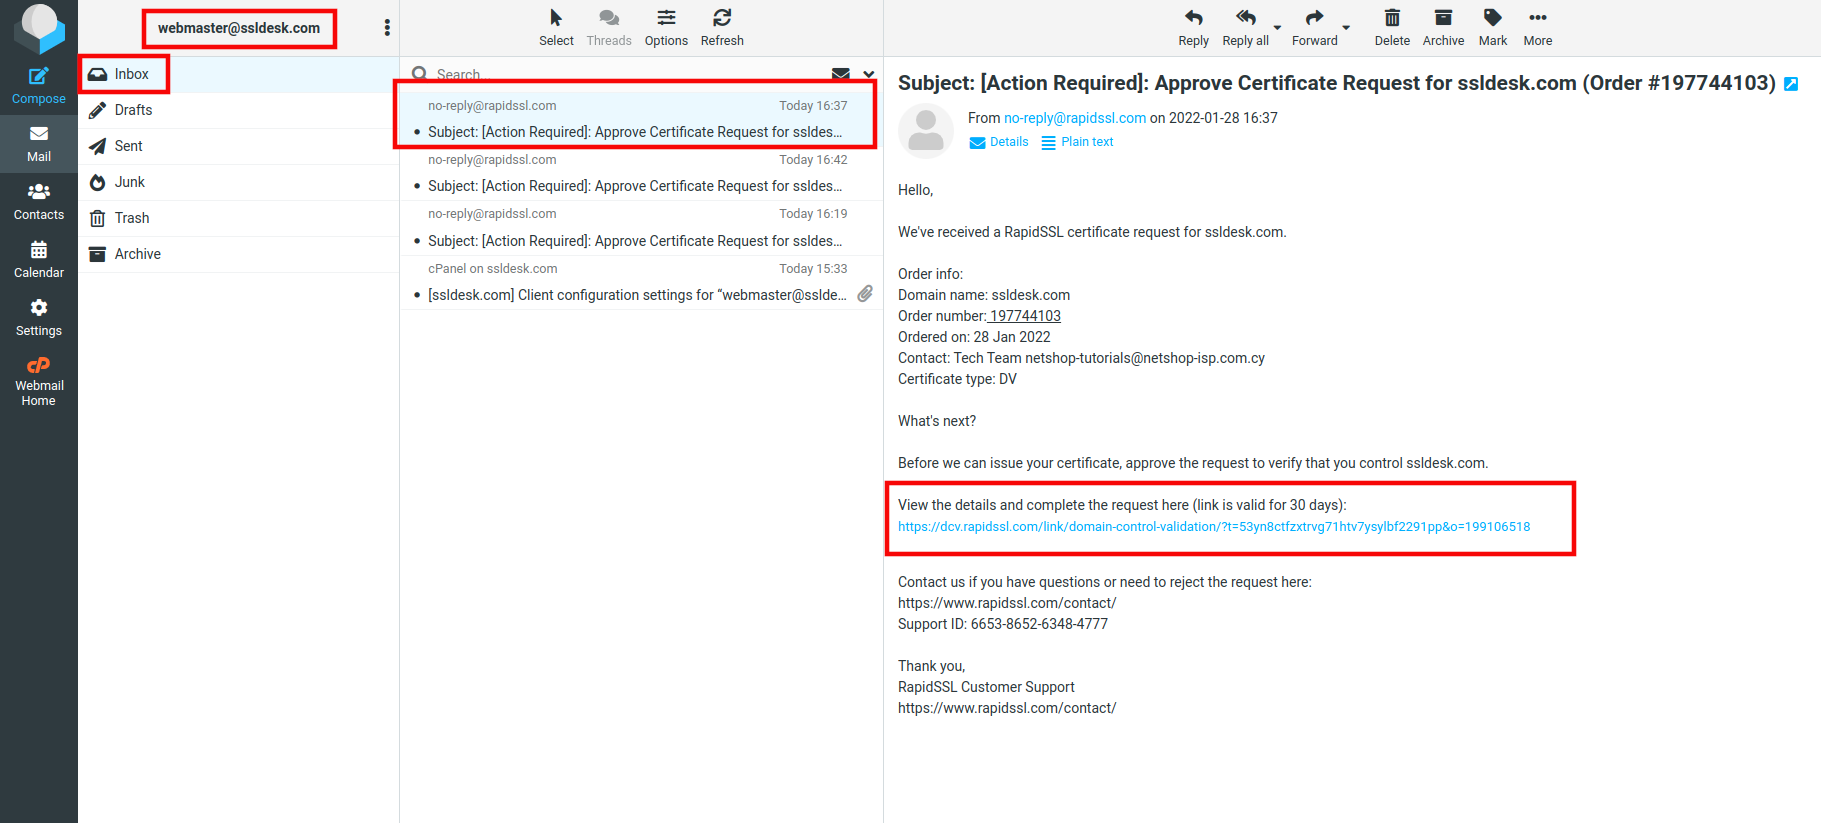
g. You should now have access to your email account associated with your domain (in this example: webmaster@ssldesk.com) through the RoundCube cPanel plugin. You should be able to see your Inbox along with all the necessary folders. Check your Inbox for the Certificate Approval Request email from the SSL vendor (RapidSSL).
Usually the email is received within a few minutes, but the vendor might need up to 24 hours to send the validation email. Open the email from the SSL vendor and click the unique link included for certificate approval and domain ownership validation.
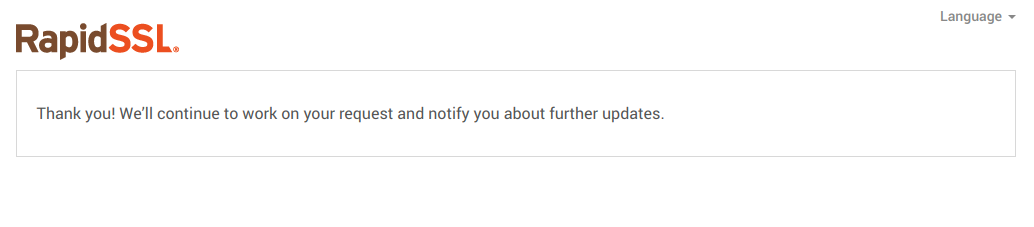
h. The unique link in the email will redirect you to a new browser tab to the vendor’s website where you need to approve your domain. Click on the Approve button to proceed.
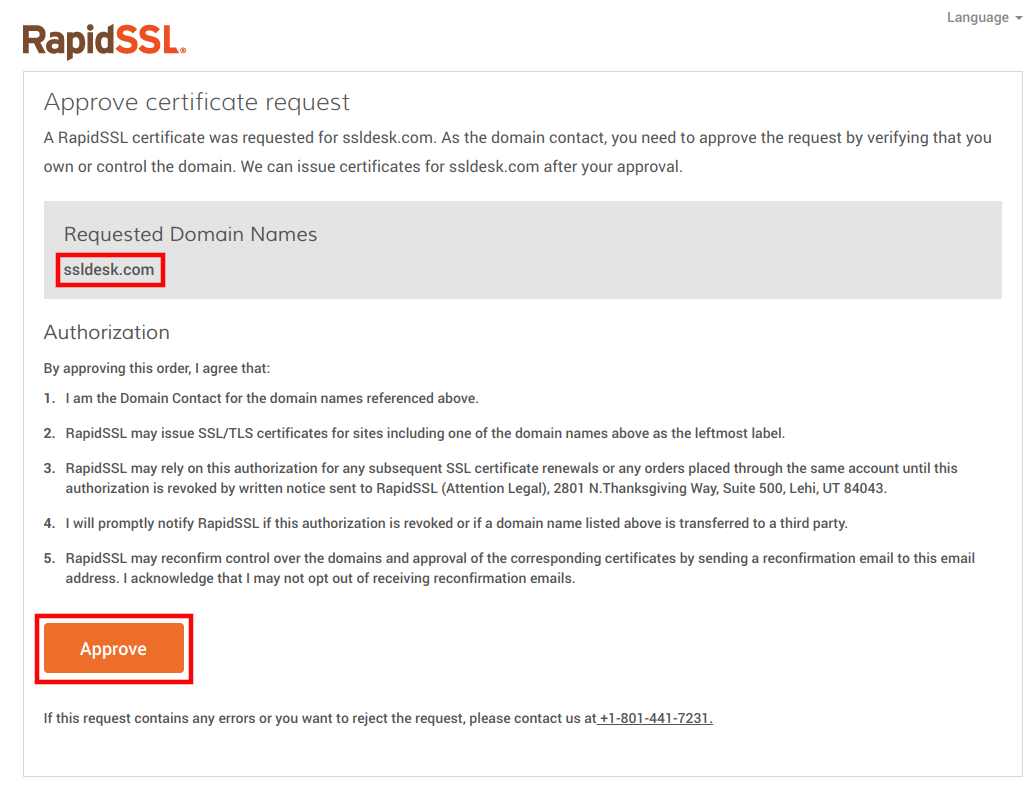
Once you approved, a confirmation message should appear.
Now that the SSL Certificate is activated and the domain is validated, we can move to the next and final section where we will download the SSL Certificate from the portal and install it on the domain on cPanel to make it secure.
Step 3 – Install SSL Certificate
We are almost done! The final step is to download the generated SSL Certificate from my.netshop-isp.com.cy portal and install it on our domain associated with the cPanel Service.
a. Go to your my.netshop-isp.com.cy portal. From the main menu on the left navigate to Services -> Addons -> SSL Certificates. Click on your SSL Certificate Service.
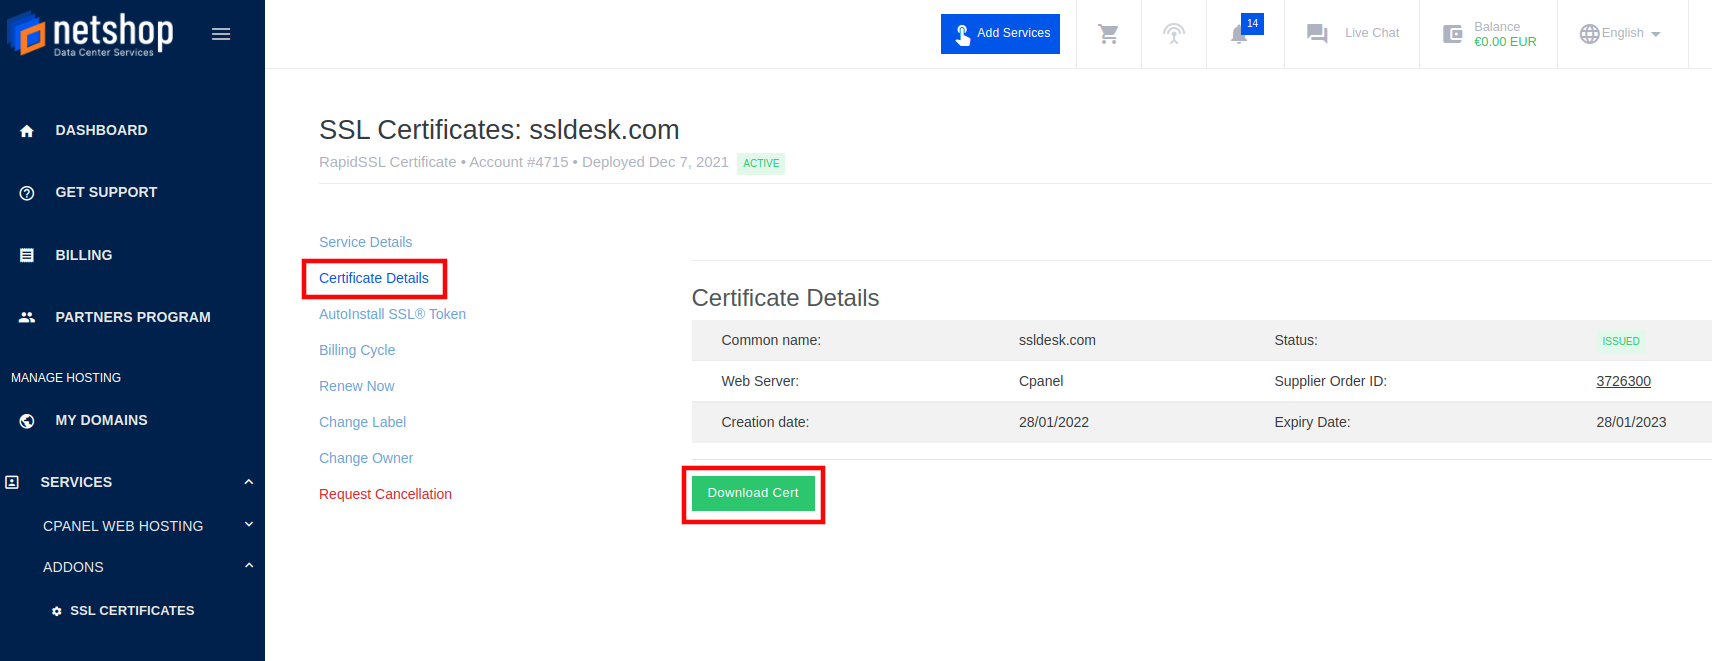
b. Click on Certificate Details and then click on Download Cert button to download the SSL Certificate.
c. A cert.zip file will be downloaded. The file contains the necessary files to install the SSL Certificate on your domain. Extract the file and open the CER – CRT Files folder.

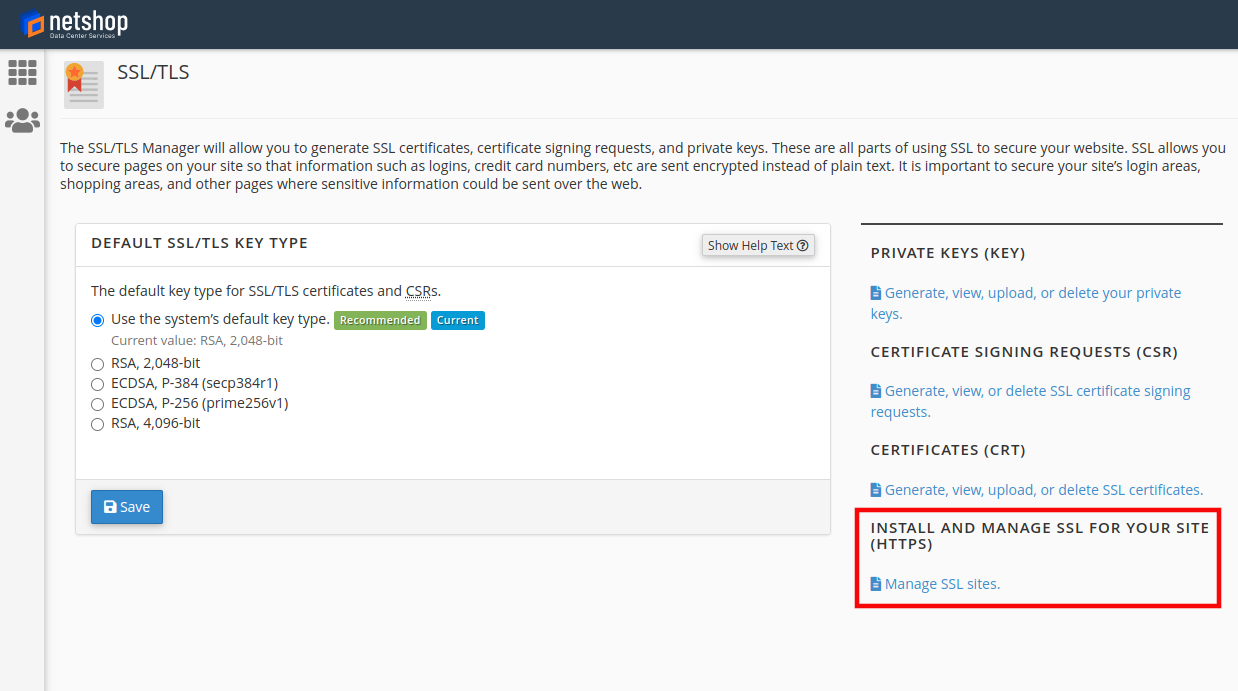
d. Go to your cPanel account -> SSL/TLS and choose INSTALL AND MANAGE SSL FOR YOUR SITE (HTTPS) option.
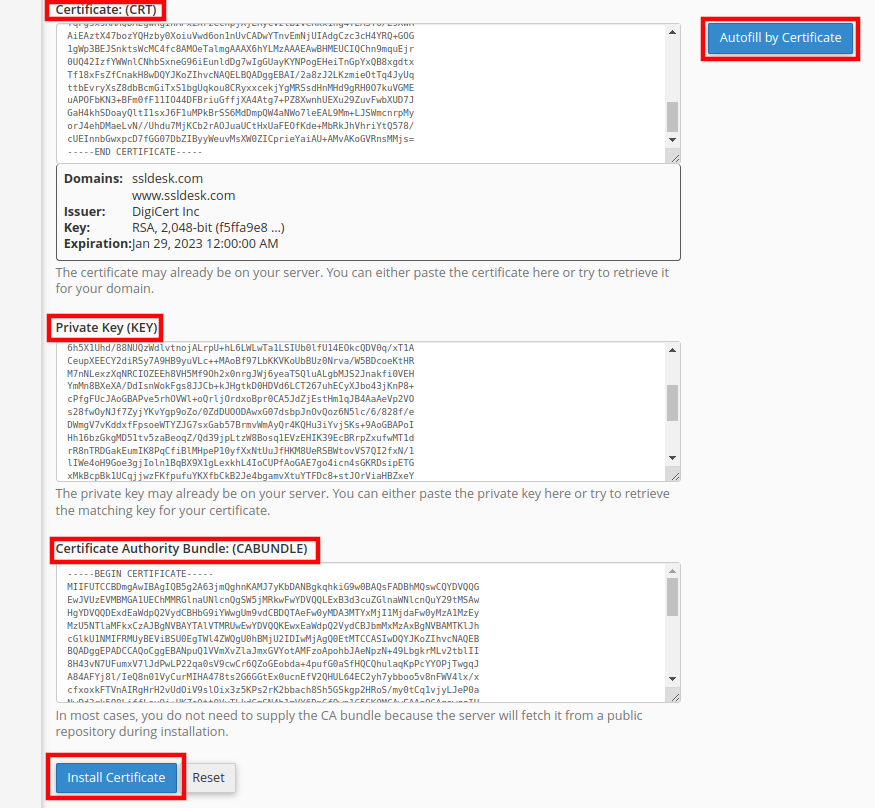
e. In the next page, you will find three empty fields that need to be filled with the contents of the downloaded SSL Certificate files and the CSR Code. Also, make sure to select the Domain for which the SSL Certificate is to be installed (example: ssldesk.com). Find below the association between the required files and the corresponding fields:
e.1. In the Certificate: (CRT) field you must copy-paste the contents of the ssldesk_com.crt (your domain) file from the SSL Certificate files (Step 3).
e.2. In the Private Key (KEY) field you must copy-paste the contents of the CSR Code generated in the previous steps (SSL/TLS -> PRIVATE KEYS (KEY)).
e.3. In the Certificate Authority Bundle: (CABUNDLE) field you must copy-paste the My_CA_Bundle.crt file from the SSL Certificate files (Step 3).
For each of the files, you will have to copy the entire code from -----BEGIN CERTIFICATE REQUEST----- until the end, including -----END CERTIFICATE REQUEST----- when submitting the text to install the SSL Certificate.After uploading the Certificate: (CRT) in cPanel, you have the option to click the Autofill by Certificate button or the Autofill by Domain button to automatically fill the rest of the field boxes.
Finally, after all required files are uploaded in the respective fields you can click the Install Certificate button.
Upon successful installation of the SSL Certificate a pop up window will verify the activation.
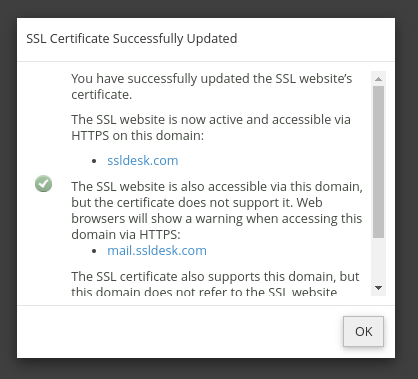
That was it! The last confirmation is to visit the website and verify that is secure. Type https://ssldesk (or you https://yourdomain URL) and check the icon next to the URL.

Summary
- Originally the domain ssldesk.com was not secured (http://). The SSL had to be installed to establish the website as secure (https://).
- The CSR was created with the use of the generated Private Key and the information provided in cPanel.
- The CSR Code was uploaded no the my.netshop-isp.com.cy portal.
- The domain was verified and the certificate validated via email in cPanel.
- The SSL Certificate was created and could be downloaded from my.netshop-isp.com.cy portal.
- Finally, the SSL Certificate on the domain and now the web server and web browser connection is secured.