


In this tutorial, you will learn how to setup software RAID on Ubuntu 20.04. Whilst hardware RAID may offer better performance and interoperability than software RAID, the latter is cheaper as no Hardware RAID controller is needed. Additionally, software raid gives users the flexibility to configure arrays without being restricted by hardware due to a special multiple device (MD) driver that is contained in Linux kernels.
About RAID Level 10 (mirroring+stripping)
RAID10, also known as RAID 1+0, is a RAID configuration that combines disk mirroring and disk striping to protect data. It requires a minimum of four disks and stripes data across mirrored pairs. If two disks in the same mirrored pair fail, all data will be lost as there is no parity in the striped sets.
Create Software RAID10 on Ubuntu 20.04
While it is possible to configure software raid on an existing Ubuntu installation using the mdadm tool, in this tutorial we will demonstrate how to do it during the Ubuntu 20.04 installation.
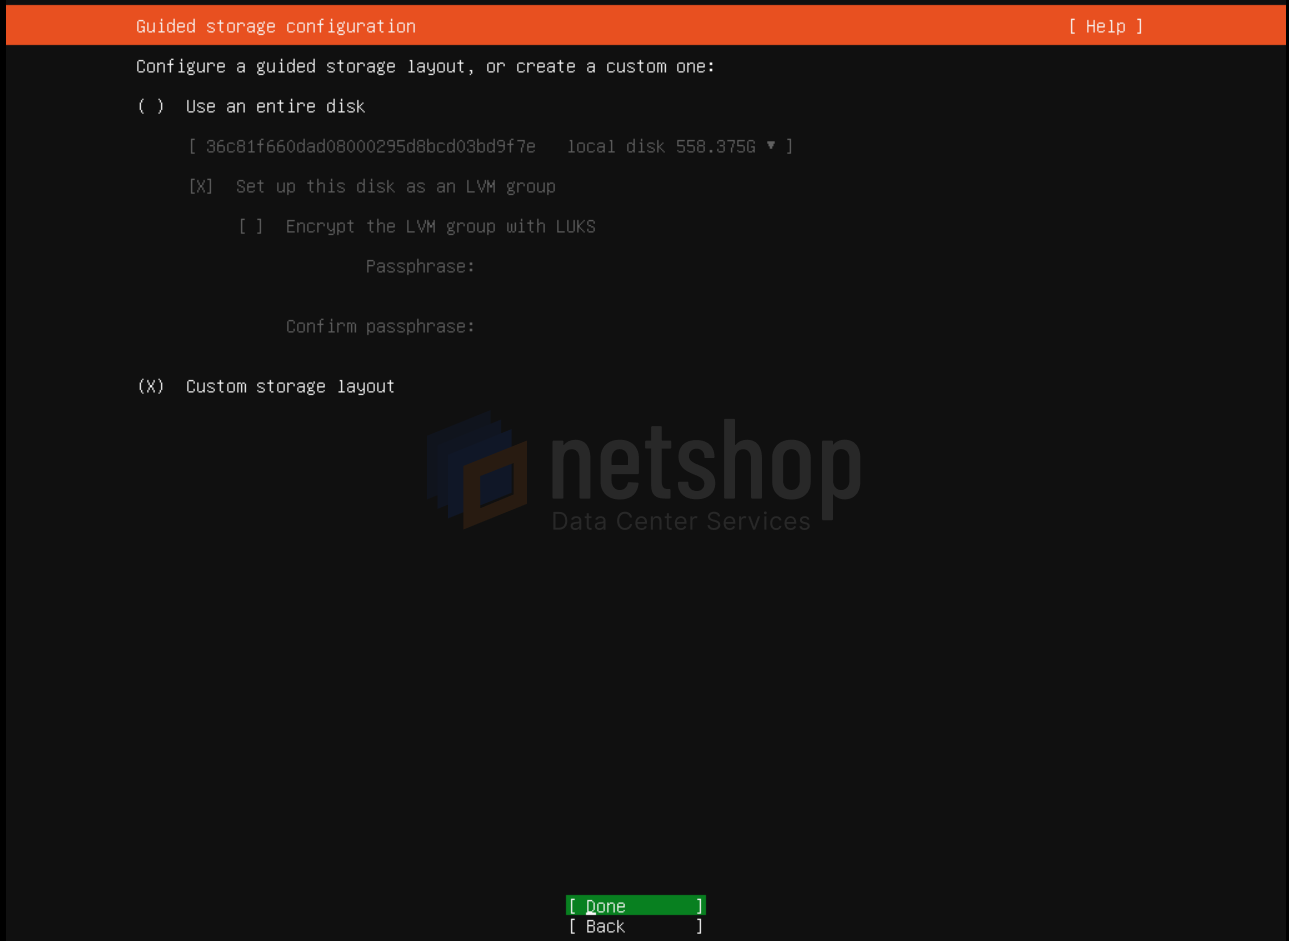
Step 1 – Guided Storage Configuration
Once prompted for disk partitioning, choose Custom Storage Layout
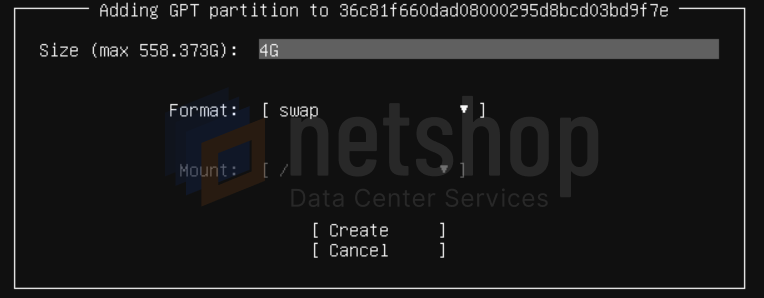
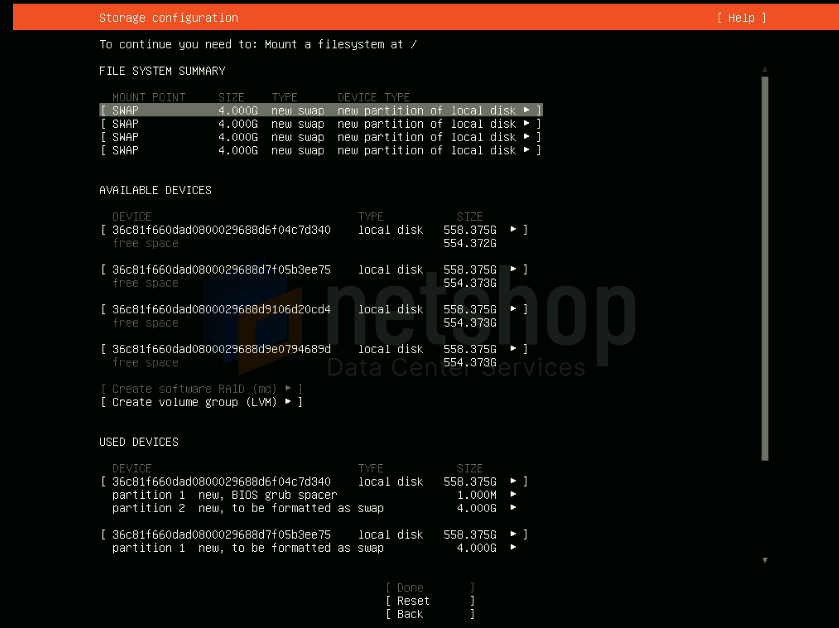
Step 2 – Create swap
In this step you need to create a swap partition for each individual disk. To do so, click the first device, hit Enter and then choose the option “Add a GPT Partition”.

Type 4G to allocate 4 Gigabytes for your swap partition.
Repeat Step 2 for all your disk devices so that you create a 4G swap partition for all of them.
Once you have completed Step 2 for all devices, your partitioning layout should look like this:
Step 3 – Create partitions
At this point we are ready to create the partition for each of our devices. From the available devices section, click the first device, hit Enter and then choose “Add a GPT Partition”.
Size: use the max value indicated
Format: choose “Leave unformatted”
Mount: choose “Leave unmounted”
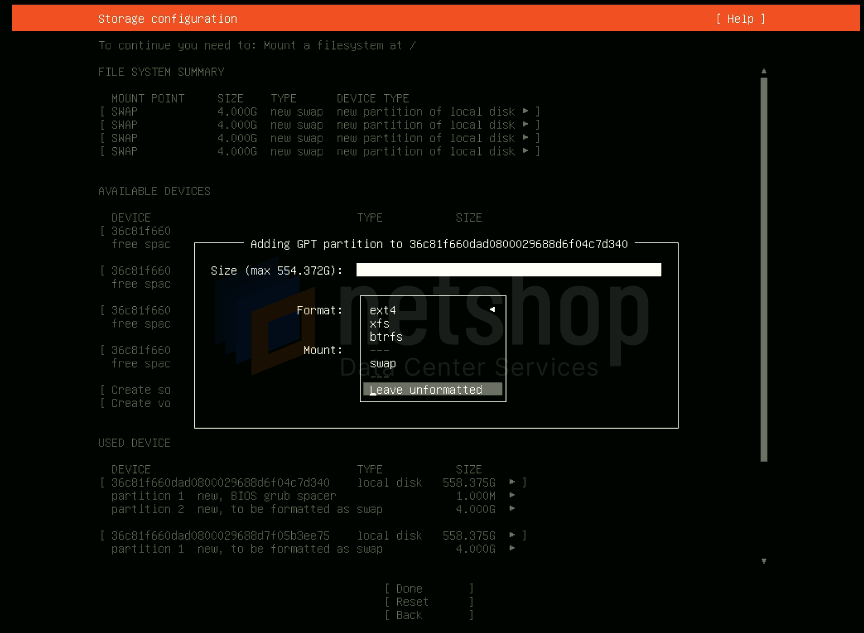
Repeat Step 3 for all of your devices.
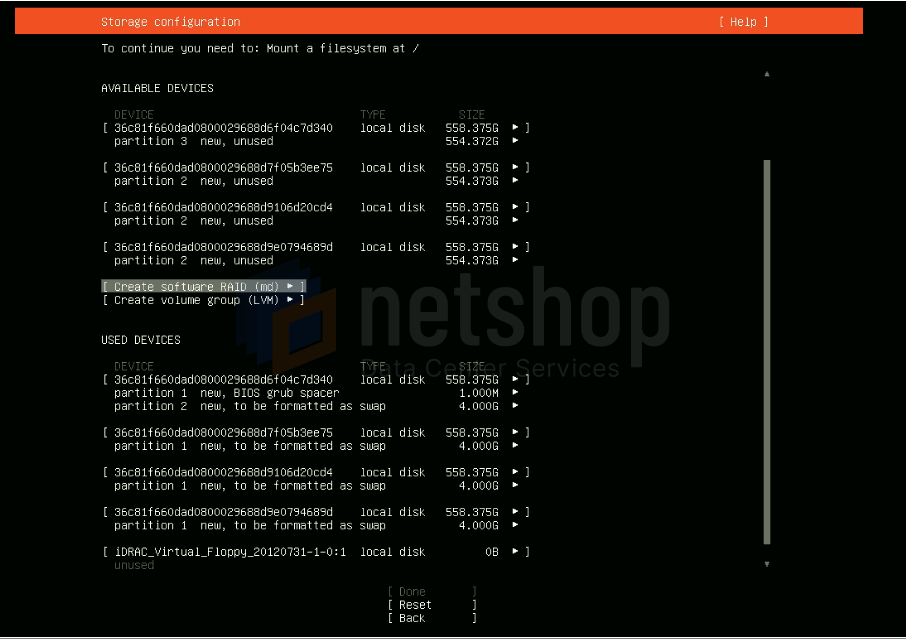
Step 4 – Create Software RAID10
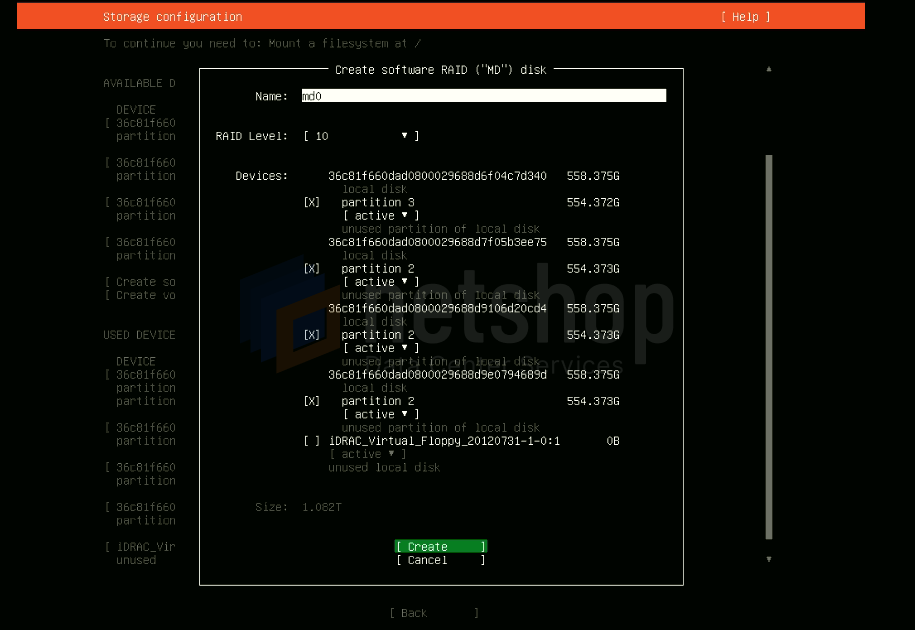
Choose “Create software RAID (md)” and you will be prompted to a menu screen as follows:
Choose RAID Level: 10 and mark the partitions to be included in the RAID.
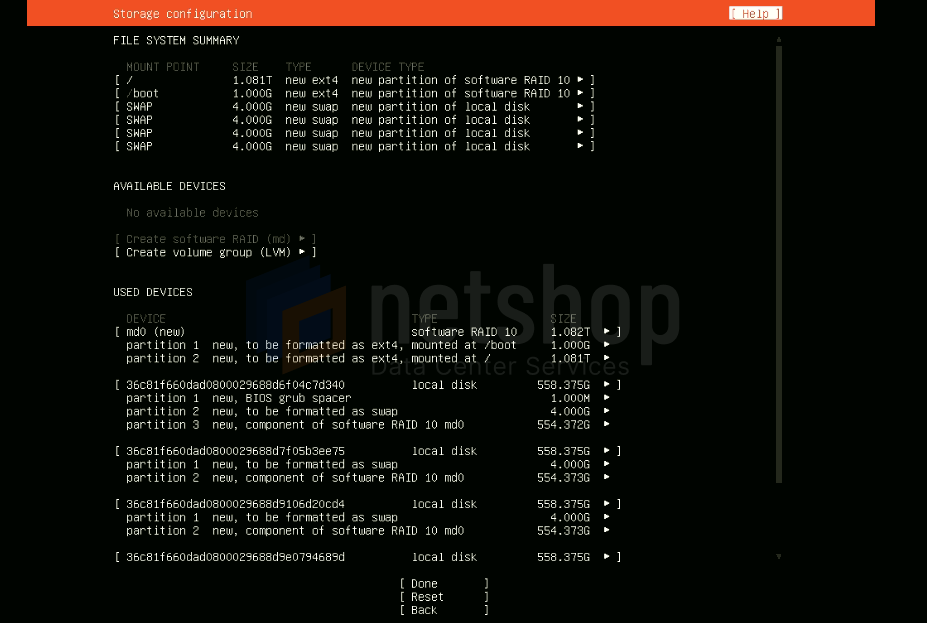
Step 5 – Create root and boot partitions
Click your newly created RAID10 partition (md0 in our example) to create the root “/” and boot partitions as shown below. Then hit [ Done ] to continue with the Ubuntu 20.04 installation.
Deploy Ubuntu 20.04 on a Cloud Server
NetShop ISP’s global cloud infrastructure is popular for deploying virtual server instances with fixed or customized specifications.
To deploy Ubuntu 20.04 on the Cloud simply choose your desired VPS plan and during Checkout choose “Ubuntu 20.04” Operating System. Upon order completion your Ubuntu cloud server will be up and running in less than 60 seconds.
Recommended Server Specifications for Ubuntu 20.04 Server edition
The recommended system requirements are:
- CPU: 1 GHz or better
- RAM: 1 GB or more
- Disk: minimum of 2.5 GB