


WordPress has become an extremely popular CMS due to its ease-of-use, extensive customization options and huge community support. Installing WordPress with LEMP Stack on a Debian 12 server provides a robust and efficient web hosting solution.
What is LEMP Stack
LEMP stands for Linux, Nginx, MySQL/MariaDB and PHP. The “E” simply stands for the way Nginx is pronounced which is “Engine-X”.
Nginx is an alternative HTTP/HTTPS web server which is known to be lighter and better performing than the Apache webserver. For this reason, web developers and system admins tend to prefer using the LEMP stack over LAMP.
In this article we will provide a step-by-step guide to installing WordPress with LEMP on a Debian 12 server.
Prerequisites
- Server with Debian 12 OS installed
- SSH Access with root or sudo-privileged user
Steps to Install LEMP on Debian 12 Server
Step 1. Switch to Root User
First, switch to the root user using the following command. Unless stated otherwise, all subsequent commands must be executed as the root user.
john@debian-server:~$ sudo –iStep 2. Update Repositories
WordPress requires that a PHP MySQL Extension is installed so that it can connect to a MySQL database. Run the following command to ensure that the extension is present.
root@localhost:~$ apt update -y && apt upgrade -yStep 3. Install PHP
root@localhost:~$ apt install php-fpm php-mysql php-gd php-cli php-curl php-mbstring php-zip php-opcache php-xml php-mysqli -yStep 4. Install Nginx
root@localhost:~$ apt install nginx -yUpon successful installation, nginx will start on your server. To verify it is running okay, open a browser and type your server’s IP address. If all went successful, you should see Nginx’s default welcome page as shown below.

Step 5. Install MariaDB
We choose to install MariaDB as it offers improved performance, faster replication speed, better security measures and additional storage engines compared to MySQL.
Let’s proceed with install MariaDB on our server:
root@localhost:~$ apt install mariadb-server -ySample Output:

Then lets proceed with securing our MariaDB installation using the mysql_secure_installation script.
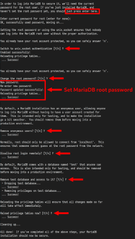
root@localhost:~$ mysql_secure_installationWhen prompted press ‘Y’ to continue and at some point you will be asked to enter a new MariaDB root password. Enter it and continue with pressing ‘Y’.

At this point you have successfully installed Nginx, PHP and MariaDB on your Debian 12 server. Let’s continue with installing WordPress on our LEMP stack.
Step 6. Create WordPress Database
Next you will need to create a WordPress Database and User. Run the following command to get an SQL shell on the MariaDB server.
root@localhost:~$ mysql -uroot -pEnter the mysql root password and hit enter to access the mysql shell console.
As soon as you are in the mysql shell console, execute the following command to create your first database along with granting access to a new database user.
Make sure you replace the database name, user and password with anything you like.
CREATE DATABASE wordpress_db;
CREATE USER wordpress_user@localhost IDENTIFIED BY 'my-password';
GRANT ALL ON wordpress_db.* TO wordpress_user@localhost;
FLUSH PRIVILEGES;
Step 7. Configure Nginx
Next step is to configure nginx. At this point you need to choose a domain name where your WordPress website will be reachable at. For the purposes of this tutorial, we use mywpsite.com as the domain name. Make sure to replace any instances of mywpsite.com in the below with your own domain name.
Run the following command to create a directory for storing any WordPress-related files to be served by Nginx.
root@localhost:~$ mkdir -p /var/www/html/mywpsite.com/public_htmlNow, let’s create an Nginx configuration file for the WordPress domain. Run the following command to open a file for editing.
root@localhost:~$ vi /etc/nginx/sites-available/mywpsite.com.confAdd the following to the file, then save the file and exit.
server {
  listen 80;
  server_name mywpsite.com www.mywpsite.com;
  root /var/www/html/mywpsite.com/public_html;
  index index.html;

  location / {
    index index.php index.html index.htm;
    try_files $uri $uri/ =404;
  }

  location ~* \.php$ {
    fastcgi_pass unix:/run/php/php8.2-fpm.sock;
include fastcgi_params;
    fastcgi_param SCRIPT_FILENAME $document_root$fastcgi_script_name;
    fastcgi_param SCRIPT_NAME $fastcgi_script_name;
    include snippets/fastcgi-php.conf;
  }
}
Finally, create a symlink in sites-enabled/ folder to the configuration file we just created.
root@localhost:~$ ln -s /etc/nginx/sites-available/mywpsite.com.conf /etc/nginx/sites-enabled/Disable the default Nginx site by removing the symbolic link for the default site from sites-enabled.
root@localhost:~$ rm /etc/nginx/sites-enabled/defaultStep 7. Validate nginx configuration & Restart nginx
Run nginx -t to make sure your configuration is valid.
root@localhost:~$ nginx -tThe output should resemble the below:
nginx: the configuration file /etc/nginx/nginx.conf syntax is ok
nginx: configuration file /etc/nginx/nginx.conf test is successful
If any errors are reported, you need to go back to the previous step and correct them by editing the Nginx configuration file.
Now, restart Nginx using the following command:
systemctl restart nginxStep 8. Install WordPress latest version
Proceed as follows to download, install and configure WordPress on your Debian 12 server.
root@localhost:~$ curl -L -O http://wordpress.org/latest.tar.gzThen extract the compressed file using this command:
root@localhost:~$ tar xf latest.tar.gzAt this point, we need to move the extracted files/folders into the directory Nginx is configured to serve files from.
root@localhost:~$ mv wordpress/* /var/www/html/mywpsite.com/public_htmlStep 9. Create wp-config.php file
WordPress comes with a sample configuration file that you can use as a template for inserting your own configuration.
Copy the sample configuration file to the location WordPress expects to read the actual configuration file from.
root@localhost:~$ cp /var/www/html/mywpsite.com/public_html/wp-config-sample.php /var/www/html/mywpsite.com/public_html/wp-config.phpThen, edit the newly created file wp-config.php and set the appropriate values for DB_NAME, DB_USER and DB_PASSWORD.
root@localhost:~$ vi /var/www/html/mywpsite.com/public_html/wp-config.php/** The name of the database for WordPress */ define( 'DB_NAME', 'wordpress_db' ); /** Database username */ define( 'DB_USER', 'wordpress_user' ); /** Database password */ define( 'DB_PASSWORD', 'my-password' );
Remember: The above values are the ones we used when creating our new database in Step 6.
Save the file wp-config.php and exit.
Step 10. Fix WordPress directory Ownership
Final step we need to do is to update the ownership of all WordPress-related files so that Nginx can serve them correctly.
root@localhost:~$ chown -R nginx:nginx /var/www/html/mywpsite.com/public_htmlNow, use your browser to navigate to http://YOUR_SERVER_IP (make sure you replace with the IP of your server), and follow the instructions to complete your WordPress installation!
Congratulations! You have successfully installed the latest WordPress with LAMP on a Debian 12 server! Deploy a Linux Cloud Server in 60 seconds and get started!


